Or, buy pdf now, ad free, for £1.50.

All Rights to Pattern and Photos Reserved by Courtney J Campbell
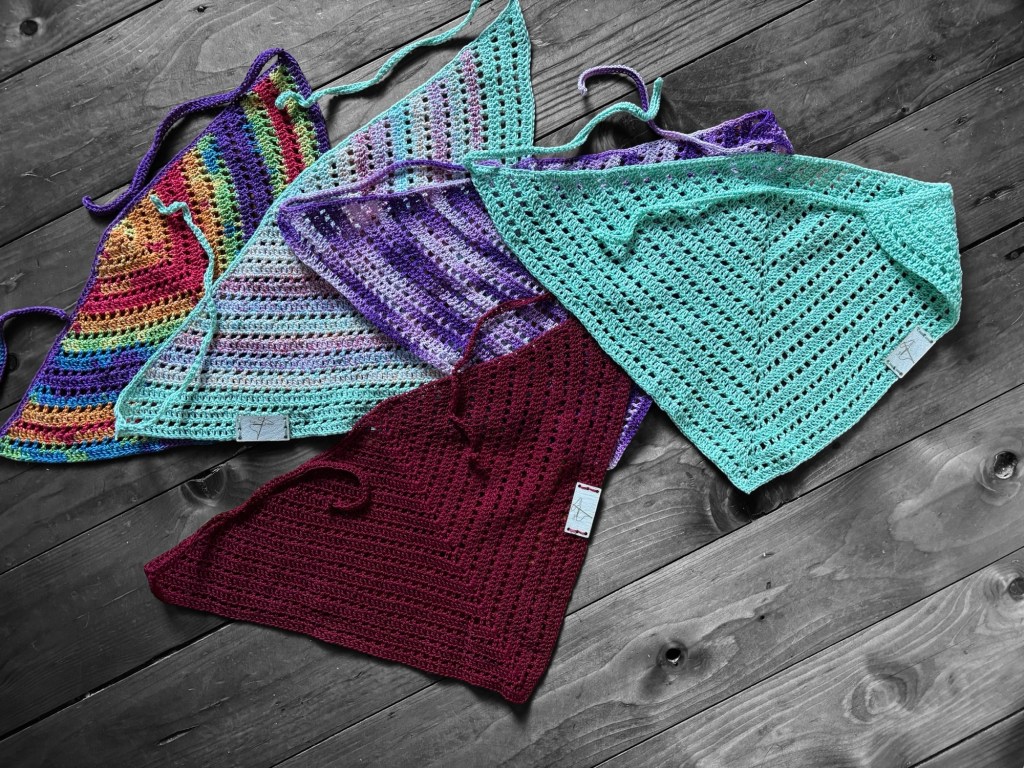
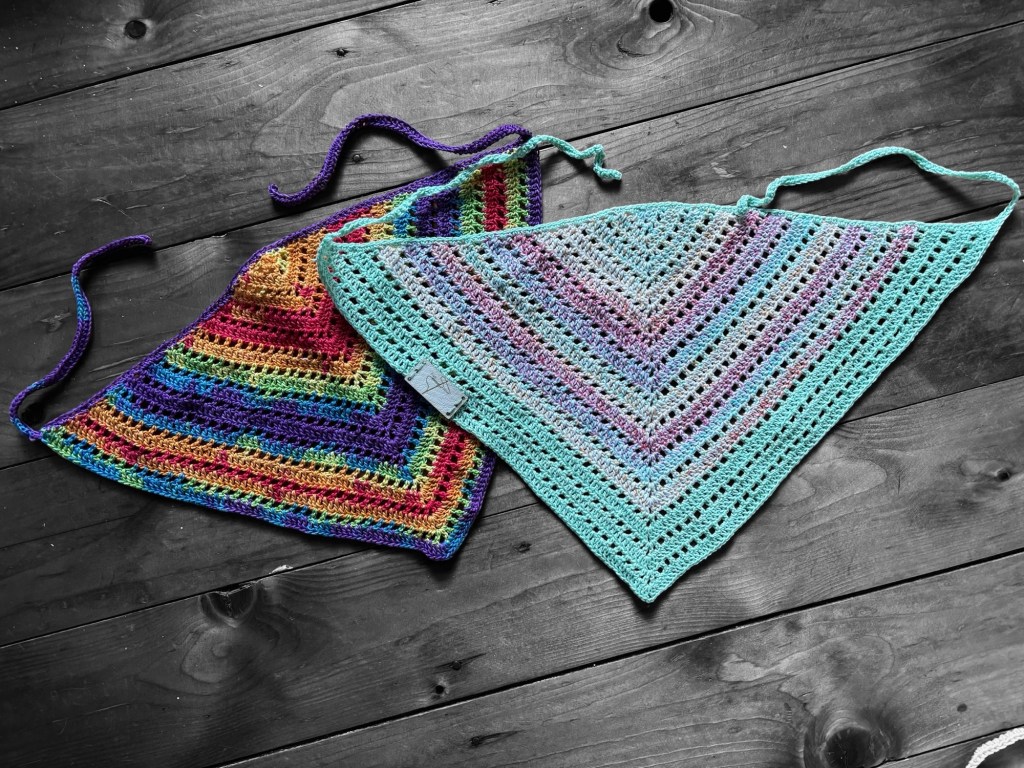
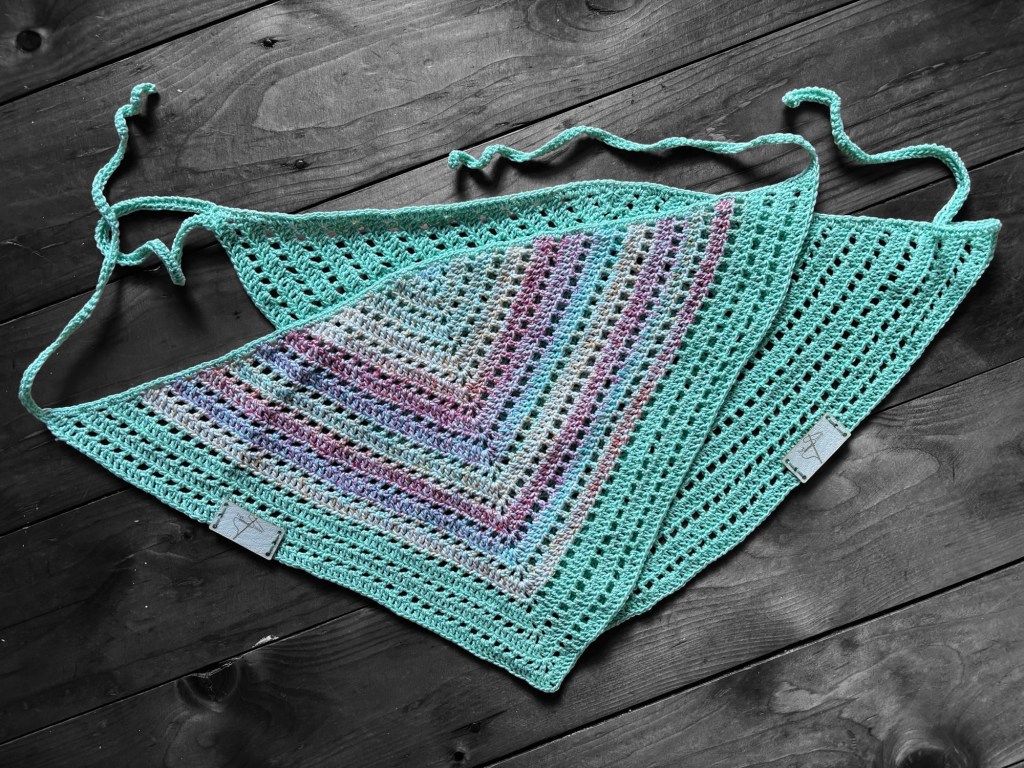
I’m excited to share this Quick Peekaboo Bandana Crochet pattern because it is so versatile and so simple. If you are a beginner, this is a great project for you. If you are more advanced, this pattern is great for churning out some quick summer gifts or items for your market stand.
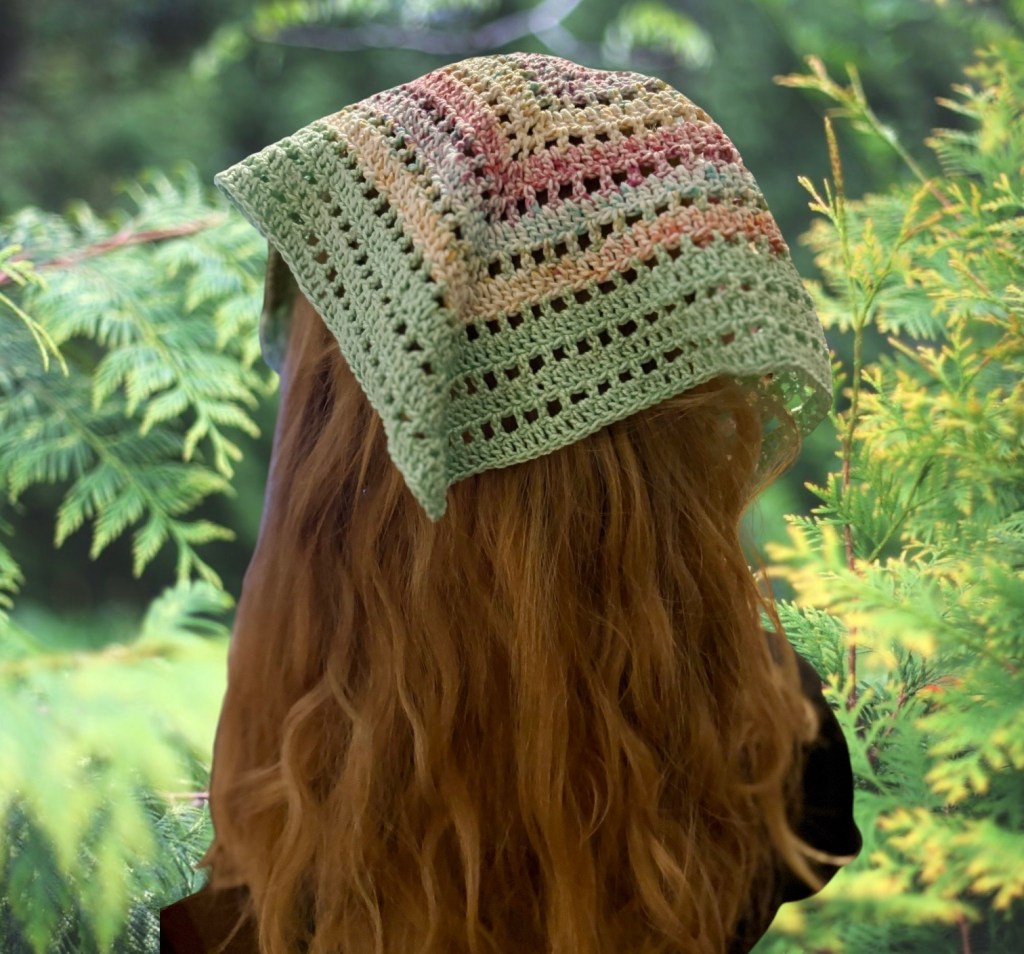
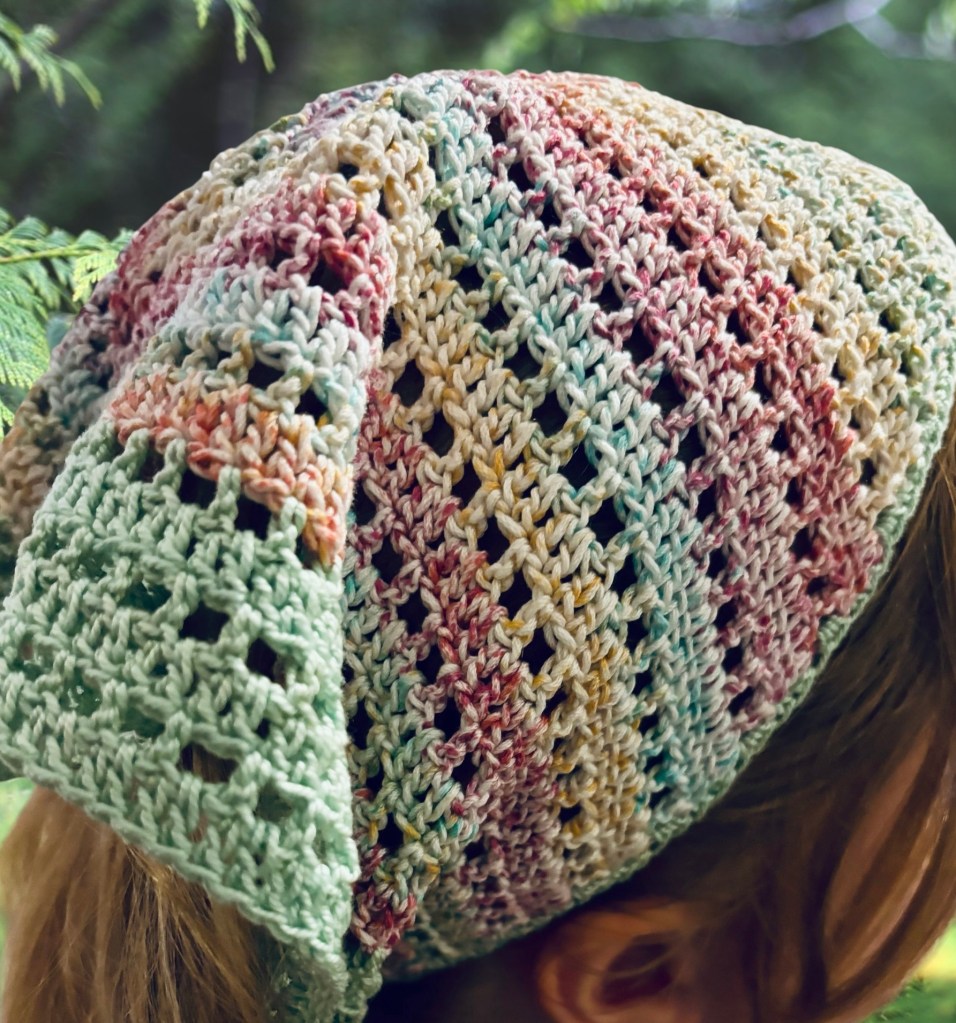
I made mine in thread (10 Crochet Cotton), but you can make it in any size thread or yarn and any in any material. The only limitation here are the contents of your yarn stash and your hair’s tolerance to friction and texture (I choose mercerized cotton to avoid tangles and frizz). Testers for this pattern chose practically every weight from thread to worsted and it came out looking great.
Even more, this bandana is made to size. While I include a size chart for those who want to make various sizes for sale at stands, you can also just hold it up to your own head or to a model to determine when to stop.
And here’s the best part — if you get really carried away and don’t feel like stopping, you can just keep going until you have a shawl or a cowl/scarf or, even, a wrap you can tie around your hips at the beach. Or you can make it large enough to tie around the chest, like a kerchief top (in this case, you can add another tie to go around the neck, attached at the middle of the base, if you wish). In any case, it works up faster and fuller if you use a sport or DK weight instead of thread.
You might also add a dainty border/edging after completing the tie straps. I left mine without for now, because I wanted this to have a simple, clean feel and also to be accessible for beginners, but I include a suggestion in the pattern of how to add a lacy touch.
Please note: as wearing this bandana requires tying tie straps at the base of the head, I do not suggest using it on small children without constant supervision. While the bandana would be very cute around a pet’s neck, I suggest attaching it to the pet’s existing collar, rather than tying around the neck, to avoid the risk of accidental strangulation.
Sizing
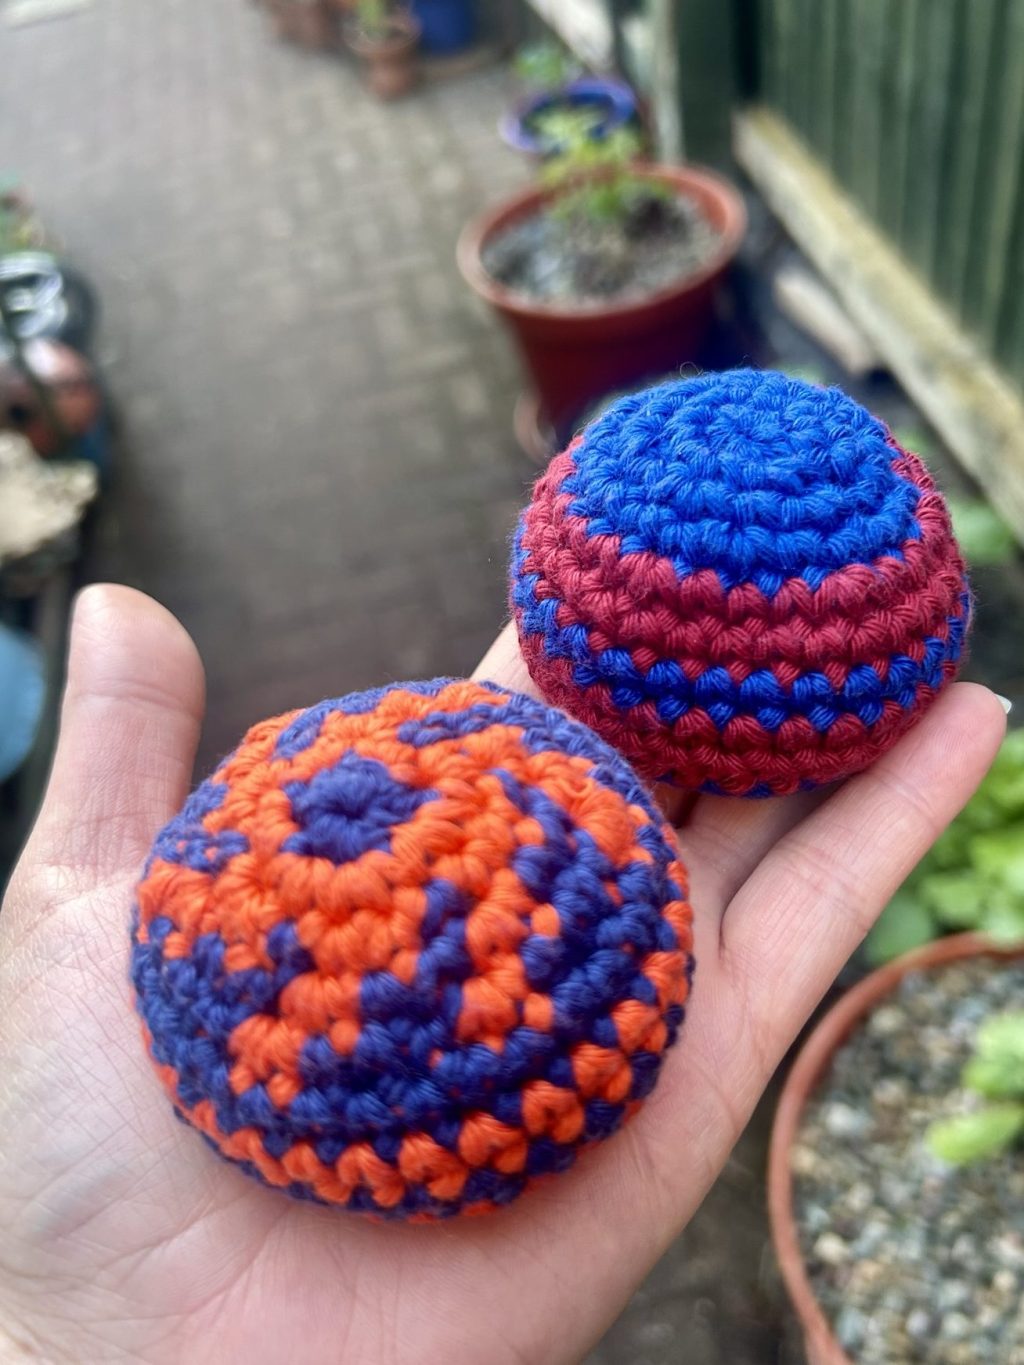
As you might have learned from my hacky sack-style footbag pattern, in which I researched standard size and weight and pulled out the scales to make sure my footbag was perfect, I am a bit of a nerd about these (and maybe a few other) things. If you want to skip the strange detour into sizing, you can scroll ahead to the pattern below.
Not wishing to re-invent the wheel, I initially sought out standard bandana sizing. This was not as simple as I thought it would be. Everyone had an opinion of one standard size; few broke it down into several sizing options. I landed on the Very Complete Bandana Size Guide from Bysporting.com, which breaks bandana sizes down by size and dimensions into a very helpful table.
While that was a helpful place to start, those measurements are for square bandanas, and we are working on triangular bandanas. Essentially, to convert the sizes of the square bandana to sizing for a triangular bandana, we (figuratively) cut the square bandana in half along the diagonal, creating two triangles. We need to find the measurement of the base of that triangle, which I represent in this handy diagram that I made in Microsoft Word:
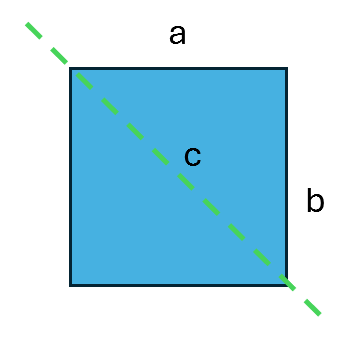
My people, I applied the Pythagorean theorum. If you want to dive deep into that relic of our high school geometry days, you can find more here. But for our purposes, it is simply stated as:
a2 + b2 = c2
The bandana sizing chart suggested a small would be 40 x 40, so, applying this to our size small:
402 + 402 = c2
1600 + 1600 = c2
3200 = c2
Flipping this, c = square root of 3200
c = the square root of (1600 x 2)
c = 40 (the square root of 2)
c = 56.57 cm (around 22 inches)
Or, we can use a calculator, like the one found here.
In the end, this return to one of my most dreaded classes (more for the teacher than for the content, to be fair) led me to sizes that were way too big. The large would have been 38 inches across at the base, which is, I assume, larger than your head.
I realized with the pattern already in the testers’ able hands that the reasons those sizes seemed so big for this particular pattern is that they included what for us is the length of a strap (if we were using a traditional bandana, we would use the corners to tie).
So I started over. I went next to the Craft Yarn Council page on head circumference measurements and adopted those measurements, subtracting 2-3 inches off each size to avoid the corners of the triangle overlapping when you tie it. These suggested measurements also align with the sizes I have made in this bandana and the sizes that the pattern testers chose to make. If are making these for market stands, I suggest making the smaller of each suggested size to cover most of the range. If you are making them for a specific person, you can the circumference (around) their head and subtract by about 2 inches or about 5 cm. You want the tips of your finished bandana to hit right behind your ears.
| Size | Base of the triangle (cm) | Base of the triangle (in) |
| Child (for kids and pets) | 35.5-40.5 cm | 14-16 in |
| Small (for teens and adults with smaller heads) | 43-45.5 cm | 17-18 inches |
| Medium (adult) | 45.5-51 cm | 18-20 inches |
| Large (adult) | 51-56 cm | 20-22 inches |
The Pattern
To complete this project, you will need to know how to:
- Chain
- Start a project in the round (even though it isn’t worked in the round)
- Increase (work two of the same stitch in the same space)
- Do a half double crochet
- Do a double crochet
- Finish off
- Weave in ends
- Change colors (optional)
- Carry colors (optional)
Difficulty level: Beginner – pattern uses chain (ch), half double crochet (hdc), double crochet (dc), slip stitch (sl st), increasing (inc), a magic ring (mr). Stitch count is included at the end of the line for each row.
Finished size:
| Size | Base of the triangle (cm) | Base of the triangle (in) |
| Child (for kids and pets) | 35.5-40.5 cm | 14-16 in |
| Small (for teens and adults with smaller heads) | 43-45.5 cm | 17-18 inches |
| Medium (adult) | 45.5-51 cm | 18-20 inches |
| Large (adult) | 51-56 cm | 20-22 inches |
Materials:
- I made mine with mercerized cotton crochet thread (size 10), but you can make this in any size or material you wish, as it is made to measure.
- Crochet hook – I used a 1.75 mm hook, but you will use the hook appropriate to the yarn you choose. You can see suggestions on your yarn label.
- Tape measure for determining size
- Yarn needle for sewing in ends
- Optional: blocking mats and stainless steel pins for blocking
Gauge: Instead of working a gauge swatch, I suggest measuring the length of the base of your bandana as you go until you reach the desired size. You do not want this to work up tight or it will be too stiff. Instead, seek a tension that creates a flowy feel.
Abbreviations
- magic ring (mr)
- half double crochet (hdc)
- double crochet (dc)
- skip (sk)
- stitch (st)
- chain (ch)
- slip stitch (sl st)
- space (sp)
NOTES:
Pattern follows US terms.
Numbers in italics at the end of each row are total st count. The starting ch 2 is included in the st count of the following row.
Repeat stitches between parentheses/brackets.
Starting ch 2 counts as first dc or hdc. Starting ch 3 counts as dc + ch 1.
INSTRUCTIONS – Please note that this pattern is simple, but not easy. Pay very close attention to your stitch count to maintain the shape.
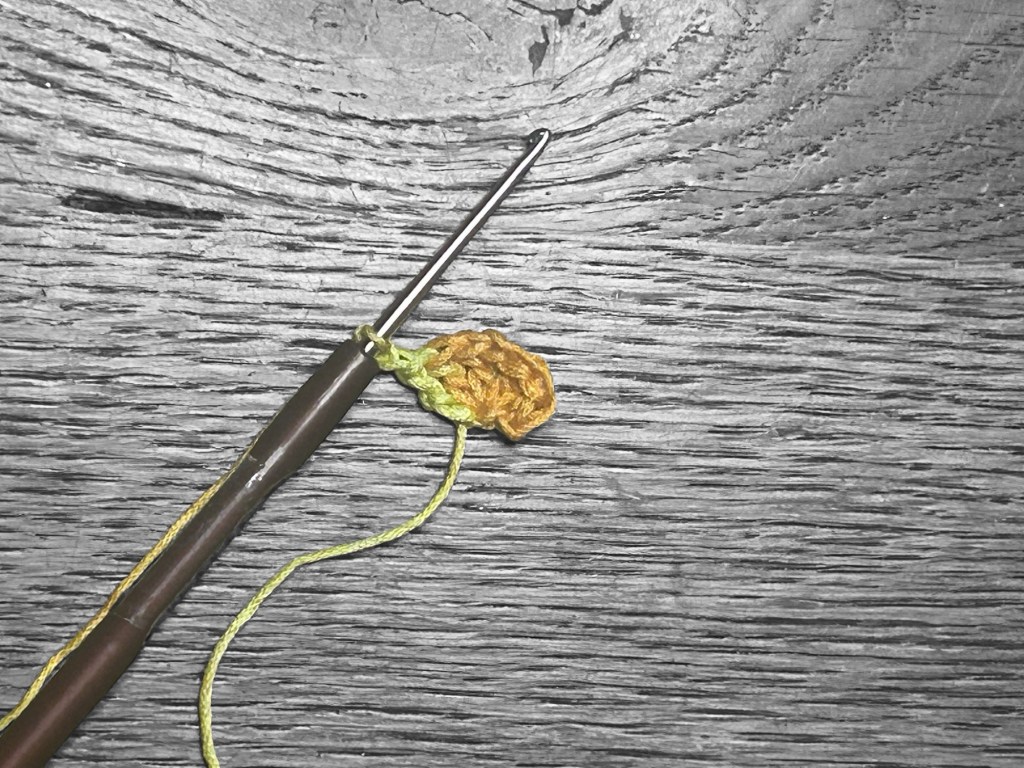
Row 1: In mr, ch 2, 2 dc, ch 2, 3 dc. Tighten to close, but do not join. Ch 3, turn. Total stitches: 6 dc, 1 ch-2 sp.
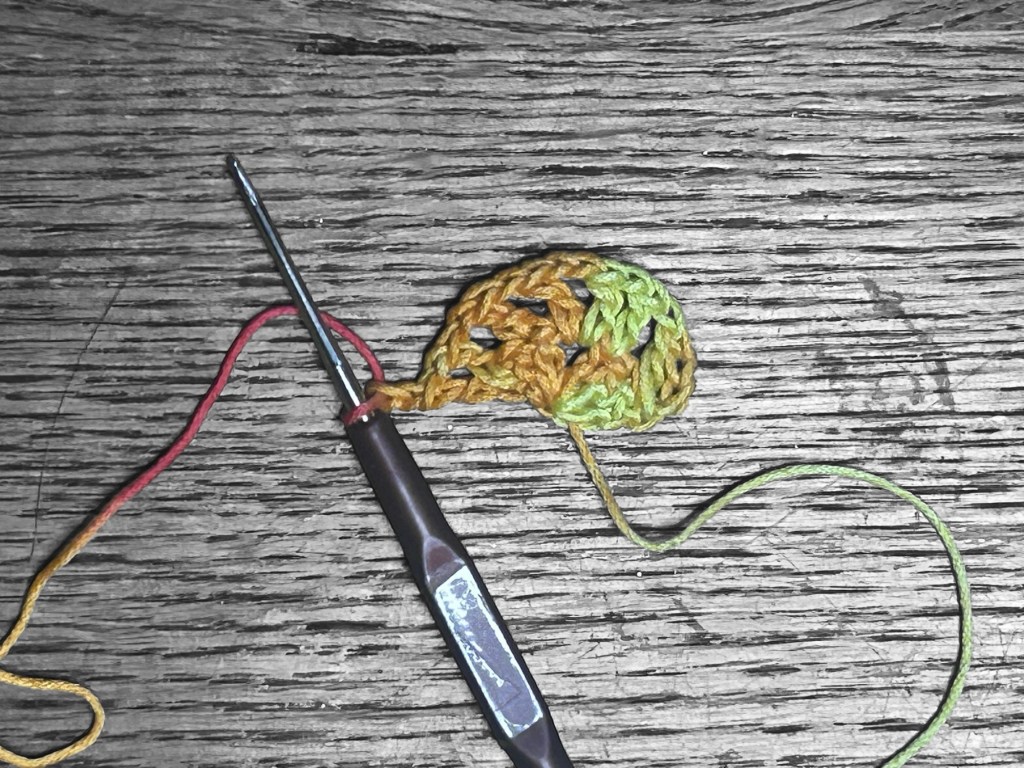
Row 2: Dc in same st as starting ch 3, ch 1, sk st, dc in next st, in center ch-2 sp (ch 1, dc, ch 2, dc, ch 1), dc in next st, ch 1, sk st, in last st (dc, ch 1, dc). Ch 2, turn. Stitch count: 8 dc, 6 ch-1 sp, 1 ch-2 sp.
Please note: Row 2 begins and ends with a (dc, ch 1, dc) in the first and last sts. In the first st, this appears as the starting ch 3 (which is a dc + ch 1) and a dc in the same st. The starting ch 3 is a dc + ch 1 throughout the pattern.
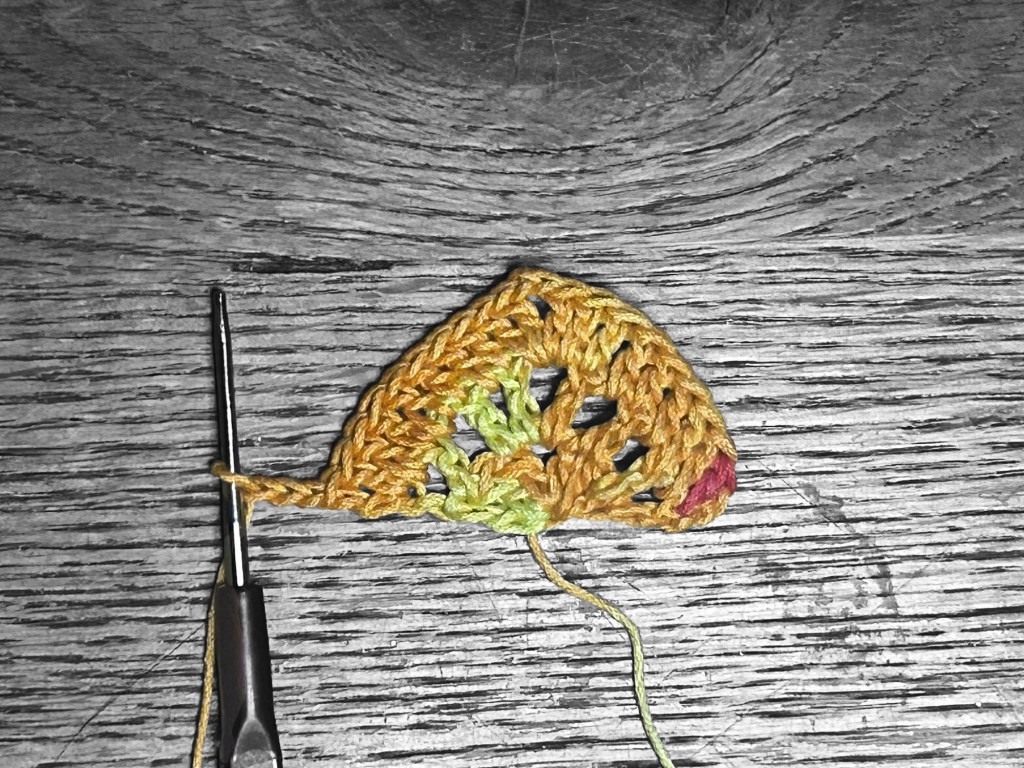
Row 3: Dc in same st as starting ch 2, dc in each st and ch-1 sp to center. In center, (2 dc, ch 2, 2 dc). Dc in next st and in each ch-1 sp and st across, including the final ch-1 sp (remember the starting ch 3 from previous row is a ch-1 sp and a dc). 2 dc in second ch of starting ch-3 from previous row. Ch 3, turn. Stitch count: 20 dc, 1 ch-2 sp.
Please note: the triangular shape relies on there being an increase in the first and last stitch of each solid line, with (2 dc, ch 2, 2dc) in the center. Remember: the starting ch 3 of the previous row is a dc + ch-1 sp. Don’t forget to place a dc in the initial ch-1 sp created by the starting ch 3 of the previous row and in the ch-1 sp made between the second-to-last and last dc of the previous row. The safest way forward here is to count your stitches at the end of each row. I offer a guide on this below.
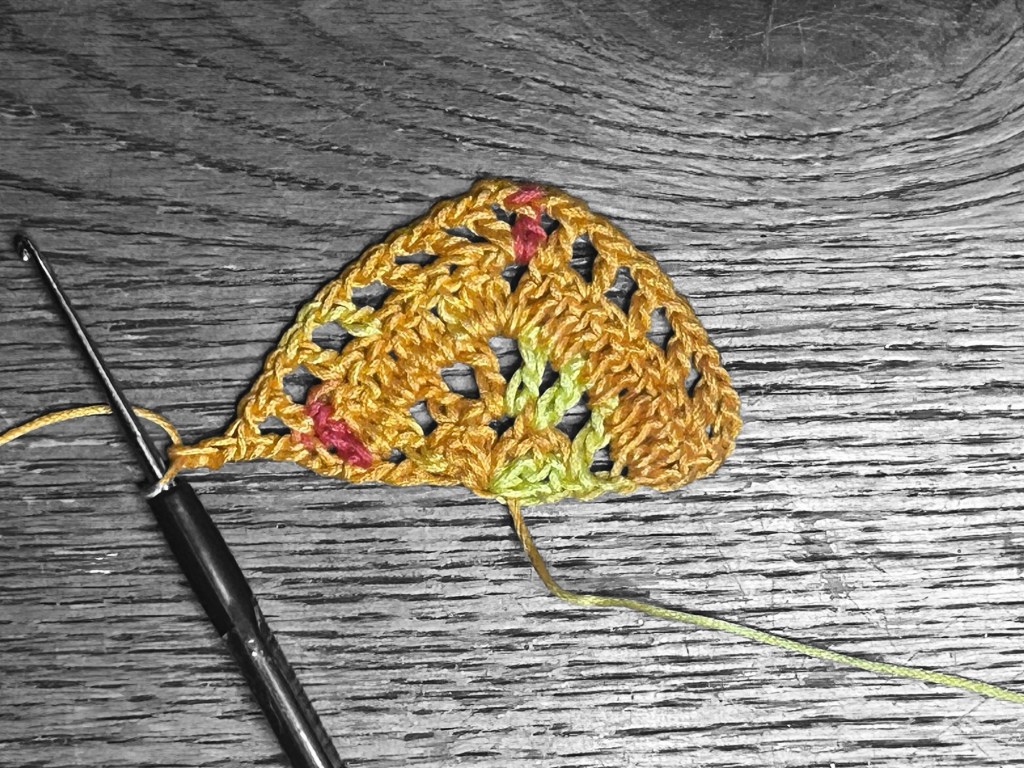
Row 4: Dc in next st, repeat (ch 1, sk st, dc in next st) across to center. In center (ch 1, dc, ch 2, dc, ch 1). Repeat (dc in next st, ch 1, sk st) across to final st, dc in last st. Ch 2, turn. Stitch count: 14 dc, 12 ch-1 sp, ch-2 sp.
Please note: the triangular shape relies on not skipping the first and second-to-last st while making the open ch-1 rows (with the exception of row 2). This means that you will end the first side with a dc in the last st before center before working (ch 1, dc, ch 2, dc, ch 1) in the center. Do not skip the first st after the center. Instead, work your first dc of the second side in that first st after center sp. This way, when you reach the end of the row, you place a dc and ch 1 in the second-to-last st of the row and a dc in the final st. In the next row, remember to place a dc in the initial ch-1 sp created by the starting ch 3 and in the ch-1 sp made between the second-to-last and last dc made here.
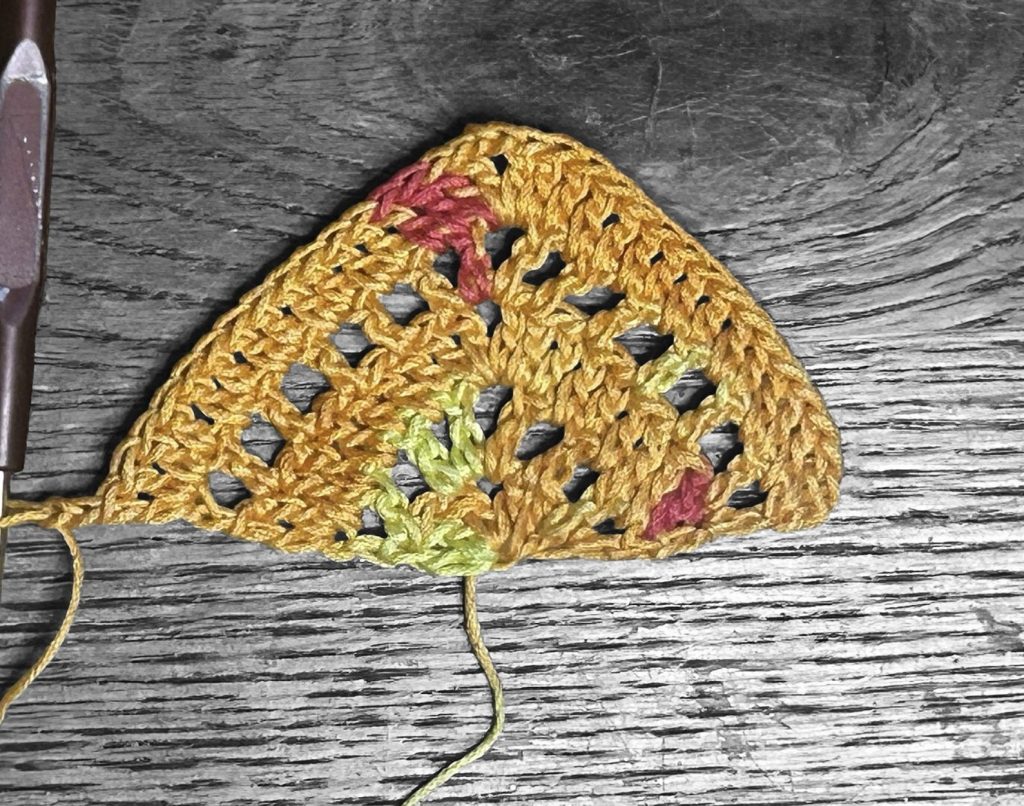
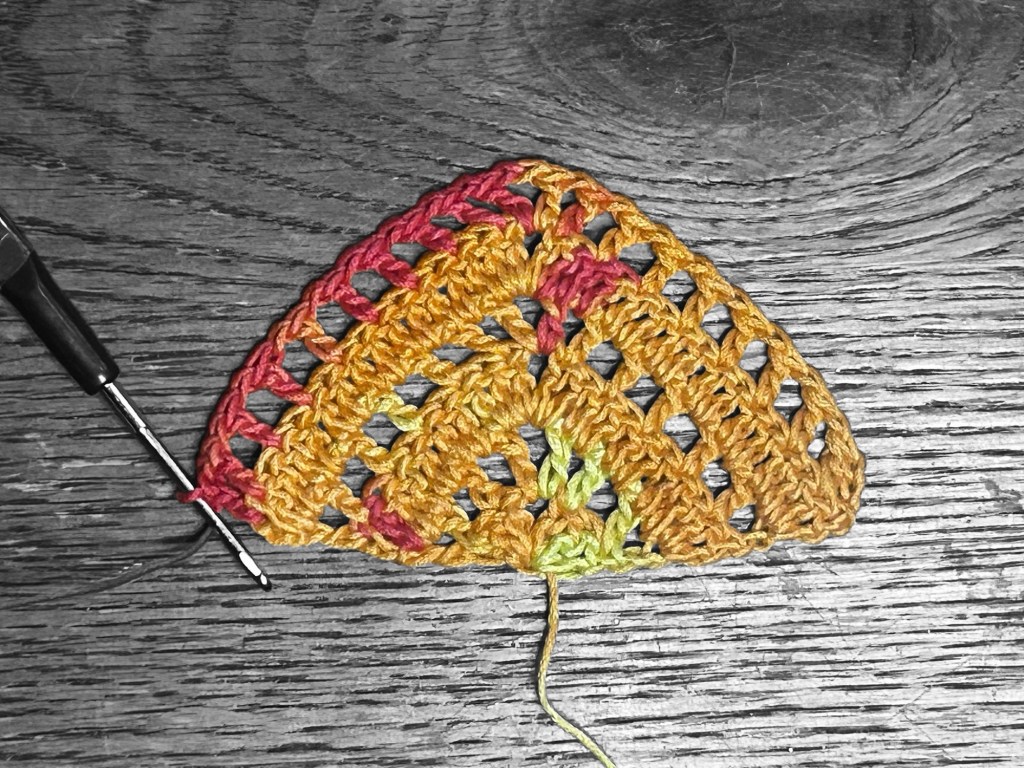
Rows 5 onward: repeat rows 3 and 4 until you reach the desired length, measuring across the base of the triangle. You will need to end on a solid row (that is, a Row 3 repeat).
When measuring, take into account whether you intend to block the bandana. If so, you will likely pull it taut and stretch it a bit, making it slightly larger than the unblocked version. In that case, measure your base stretched. You want the tips of the bandana to reach to slightly behind your ears.
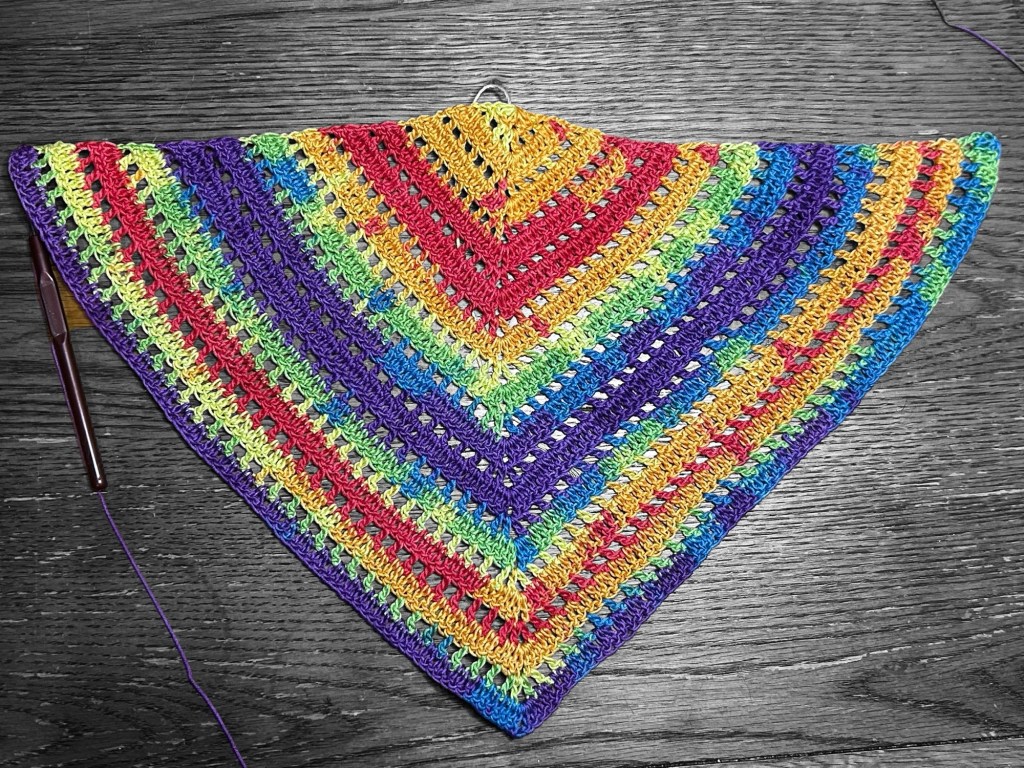
From here on, each odd row will have 12 more dc than the previous odd row, while each even row will have 6 dc and 6 ch-1 sp more than the previous even row. So, for example:
- Row 5 will have 32 dc and Row 6 will have 20 dc and 18 ch-1 sp.
- Row 7 will have 44 dc and Row 8 will have 26 dc and 24 ch-1 sp.
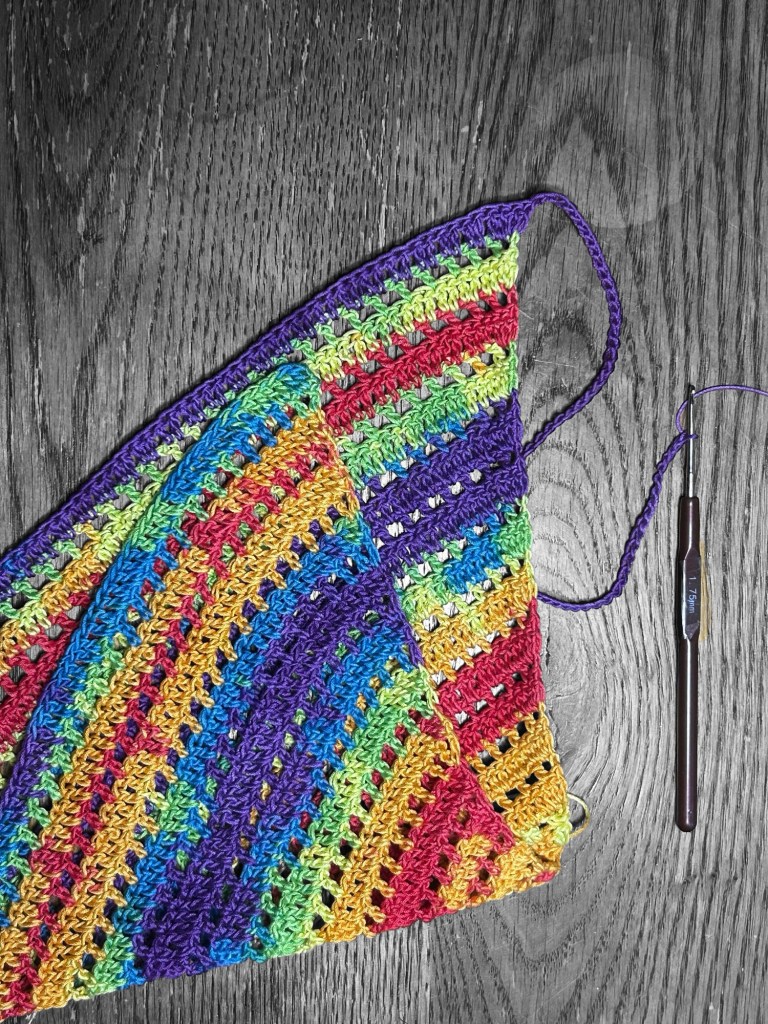
Once you have reached the desired size, at the end of a row of solid dc, ch until you reach a length of around 12 inches / 30.5 cm. You may have to adjust this length for thicker yarn.
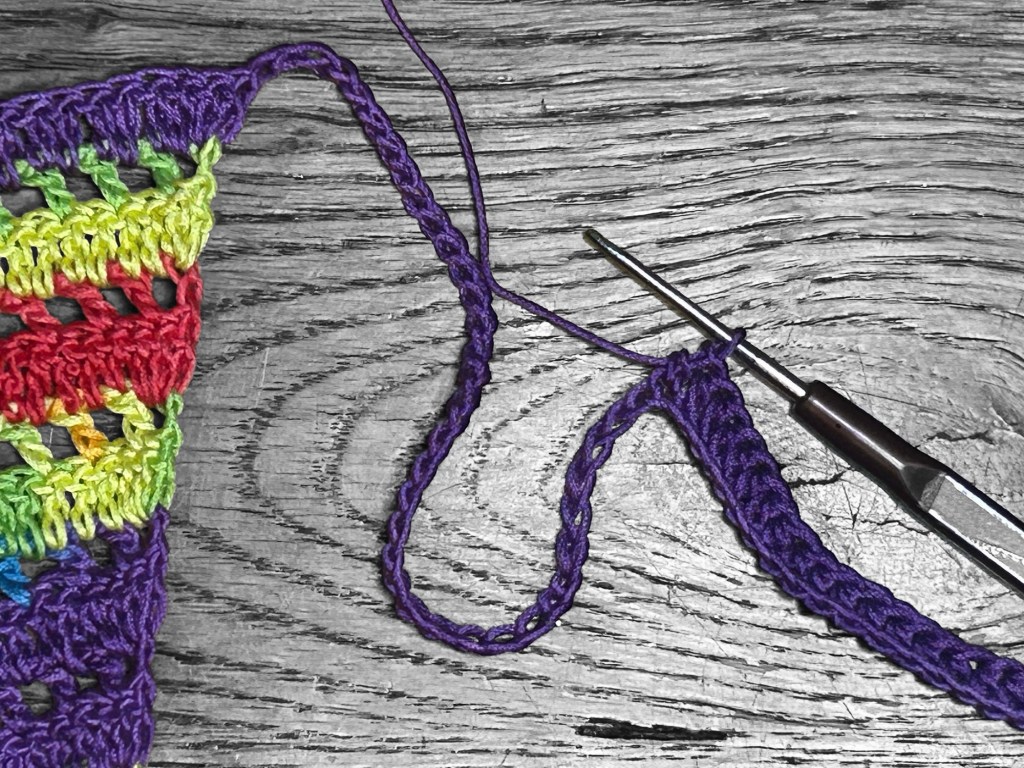
Hdc in third ch from hook, hdc in each ch to body of bandana. If you are using especially thick yarn, you might want to do sc here instead of hdc.
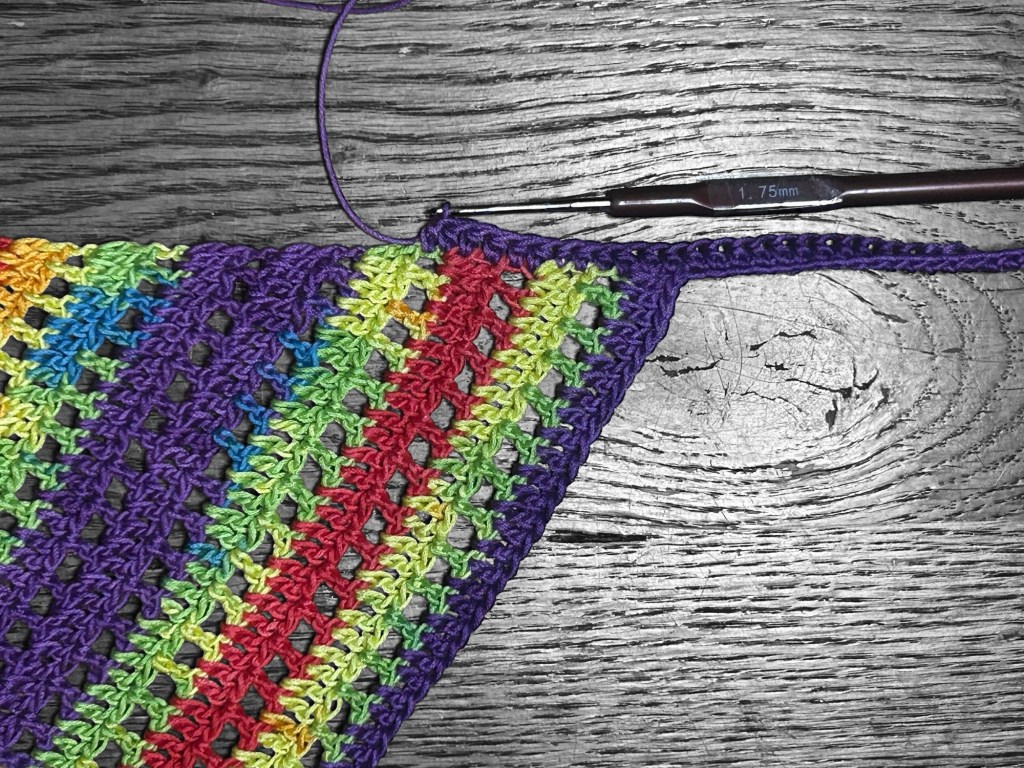
When you reach the body of the bandana, work 2 hdc per row across to the mr space in the center of the base of the triangle. Hdc in mr space. 2 hdc across to end of base of triangle. Your total number of hdc will depend on how many rows you did to reach the desired length.
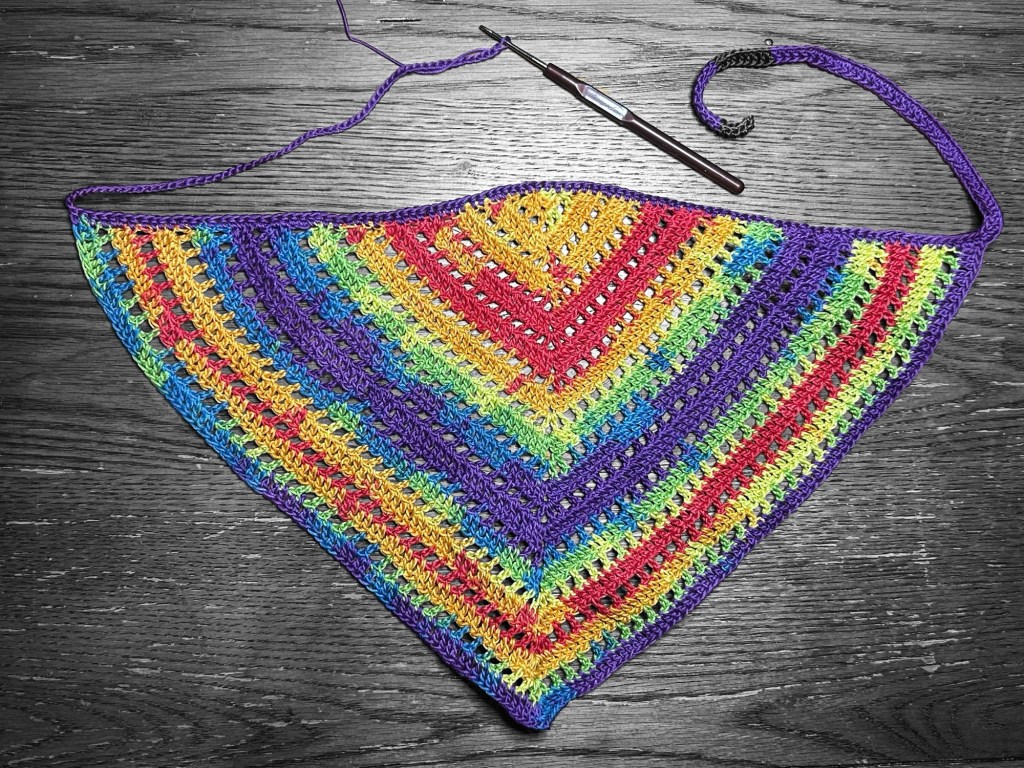
At end of base, ch until you reach a length of around 12 inches / 30.5 cm. Hdc in third ch from hook and in each ch back to the body of the bandana. If you used sc instead of hdc on the first tie strap, do the same here.
Sl st to body. You might have to flip or turn the bandana to do this.
You can, optionally, add an edge along the remaining sides of the triangle. The spacing for this will depend on how many rows you have made to complete the bandana, but if you are comfortable winging it, I suggest something like repeating (sc, ch 4, picot in 2nd ch from hook, ch 2, sk 2 st, sc) across to the center ch-2 sp. Work in the center ch-2 sp (sc, ch 4, picot in 2nd ch from hook, ch 2, sk 2 st, sc), then repeat the pattern across the second side.
Fasten off.
Weave in ends.
Block, if desired, according to material.
Now, wear it, gift it, or sell it!
I’d love to see your finished item! Tag @FiveStitchesCrochet on social media. Share it in a comment below and don’t forget to subscribe to receive my latest free patterns!
Thank you to the amazing crocheters who tested this pattern and provided valuable feedback. I am so blown away by the work you have done and humbled by your support!
- Mandy Speight, @sp8ball
- Khush Kreationz, @khushkreationz
- Tanya Huyton, Tan’s Forever Keepsakes, @tanyahuyton
- Knits by Judi, @knits_by_judi
- Jess Gilbert, @kirine_crochet_co
- Michele Cramer, @chelscrochetcreations
- Koda Hefty, @hefty_miniature_painting
- Kyrie’s Kitties Crochet, @kyrieskitties
- Wendy Alvez Ocampo, @mamawendz_ocampo
- Kristie Wolfenbarger, @nerdy_crafty_tattooed_ginger
- Alison, @makeitcrochet
- Amanda (Panda), @pandas_crochet_corner
- Kristin’s Little Stitch Shop, @kristins_little_stitch_shop
- Wyn, @moonbearfibers
- Opal Pickard
- Alexandria Reiners, @galaxy_maiden
- Brande Postava, @brande0421
Thank you!
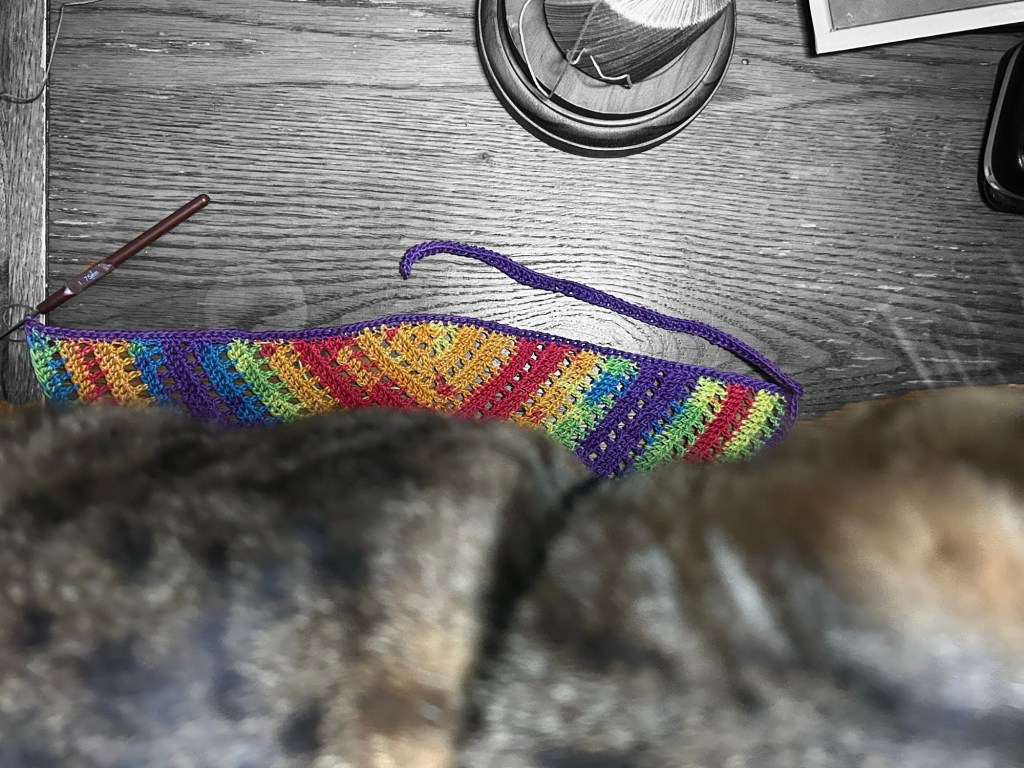
And, of course, enjoy the obligatory cat photo bomb, this time, featuring Kiki. I can’t get through one photo tutorial without one of them insisting they are relevant to the process.
All Rights to Pattern and Photos Reserved by Courtney J Campbell



Leave a Reply