Quick, last-minute gift in various sizes
Or, buy now, ad free, for £2.
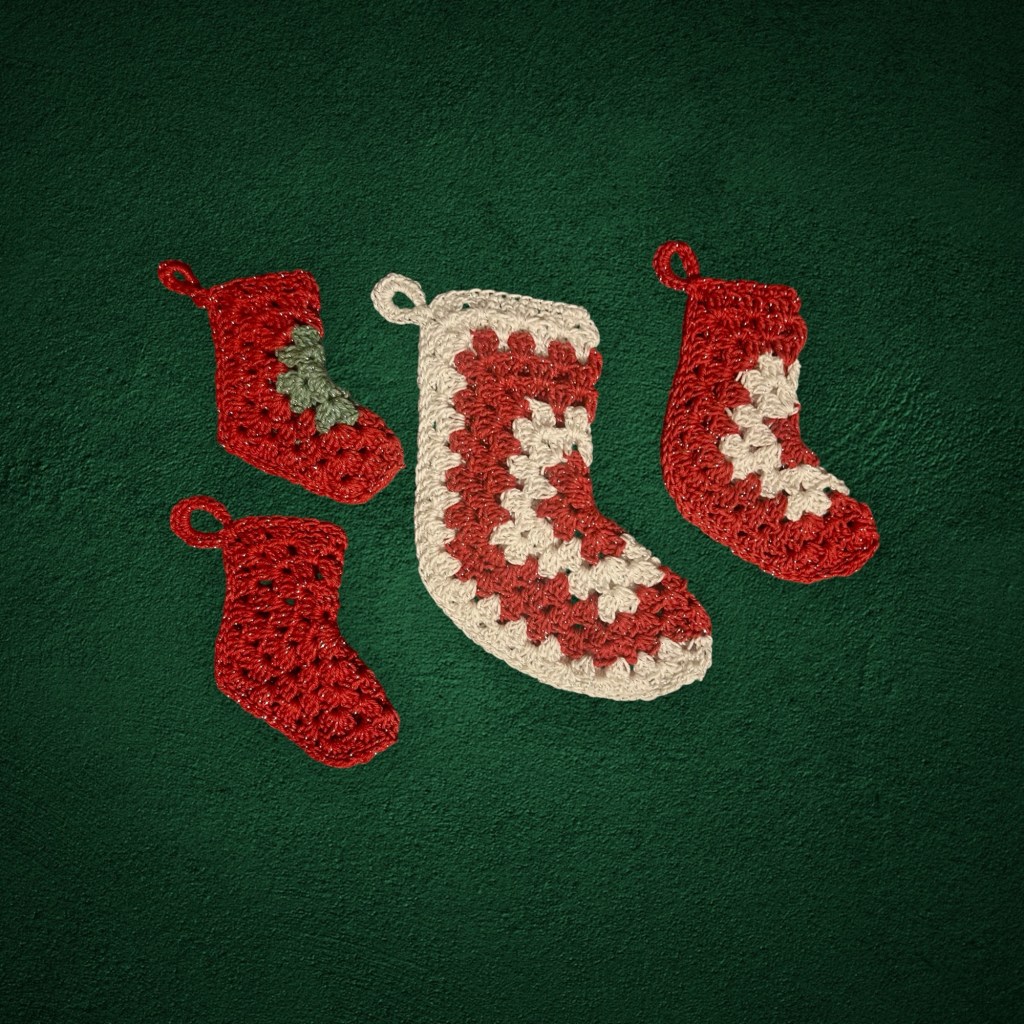
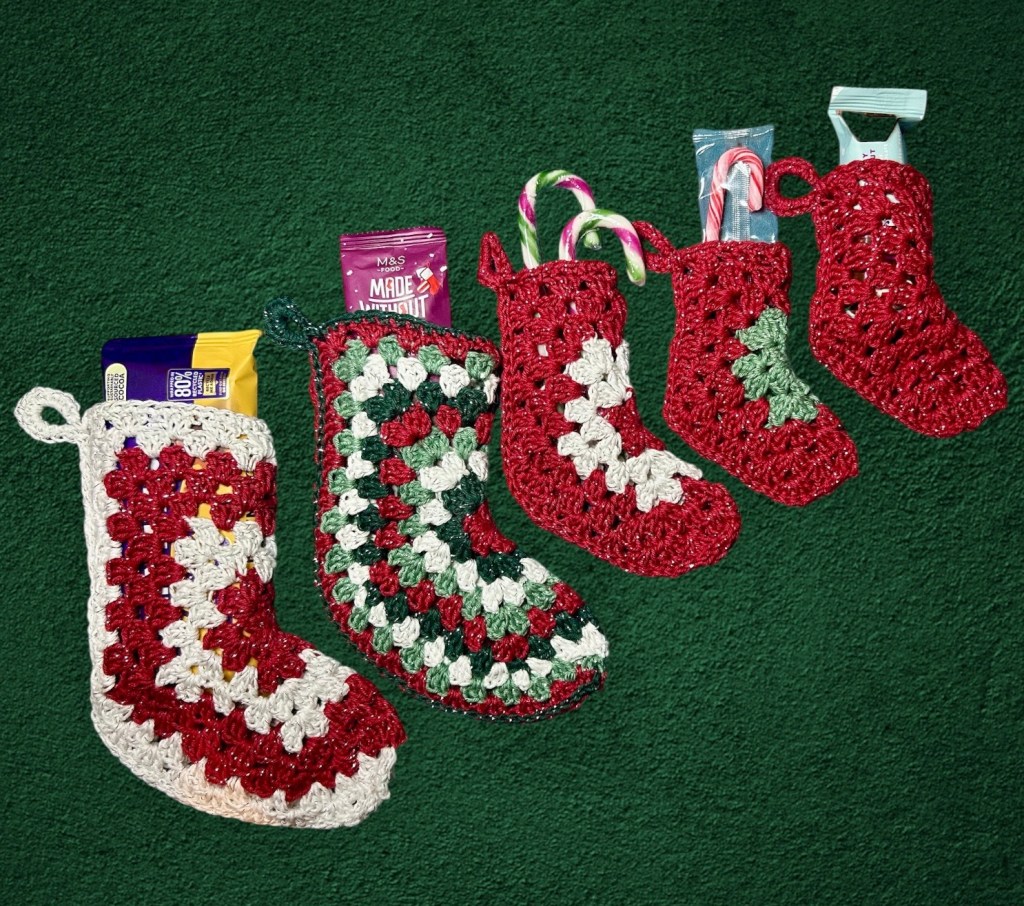
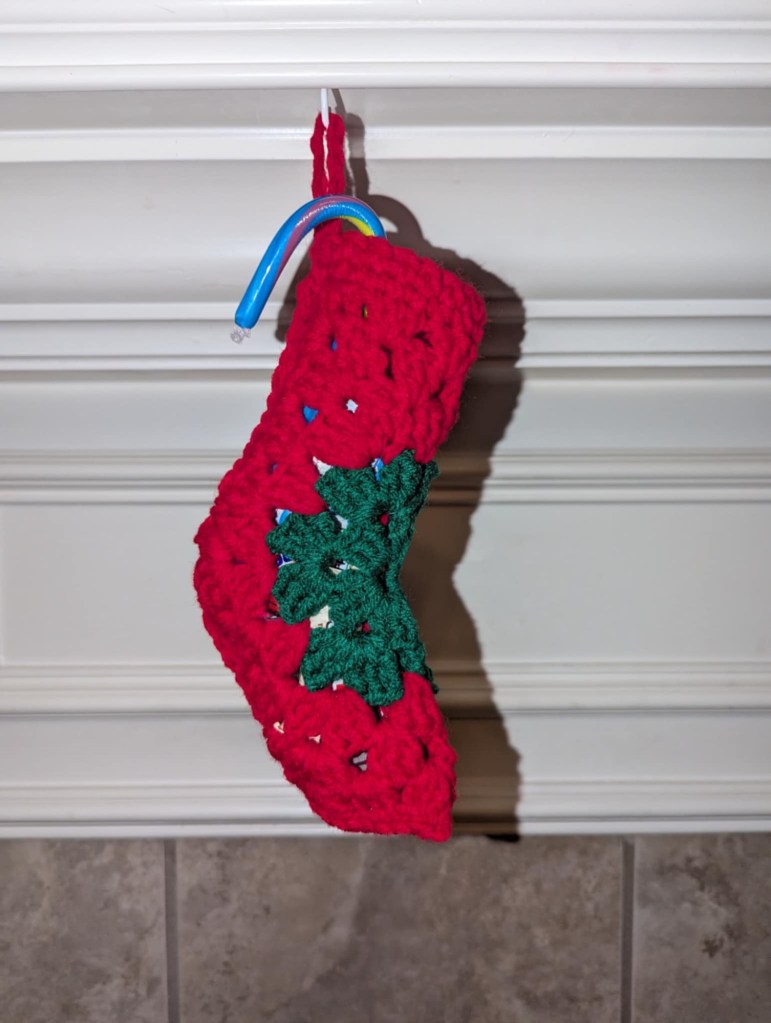
A granny hexagon stocking is an easy, straightforward make. I’ve made them for years in various sizes (which I include variations for below). The small one is just the size for stuffing a few mini-candy canes into. The medium is perfect for regular candy canes or even a narrow chocolate bar, and the large one you can put more sizeable gifts into.
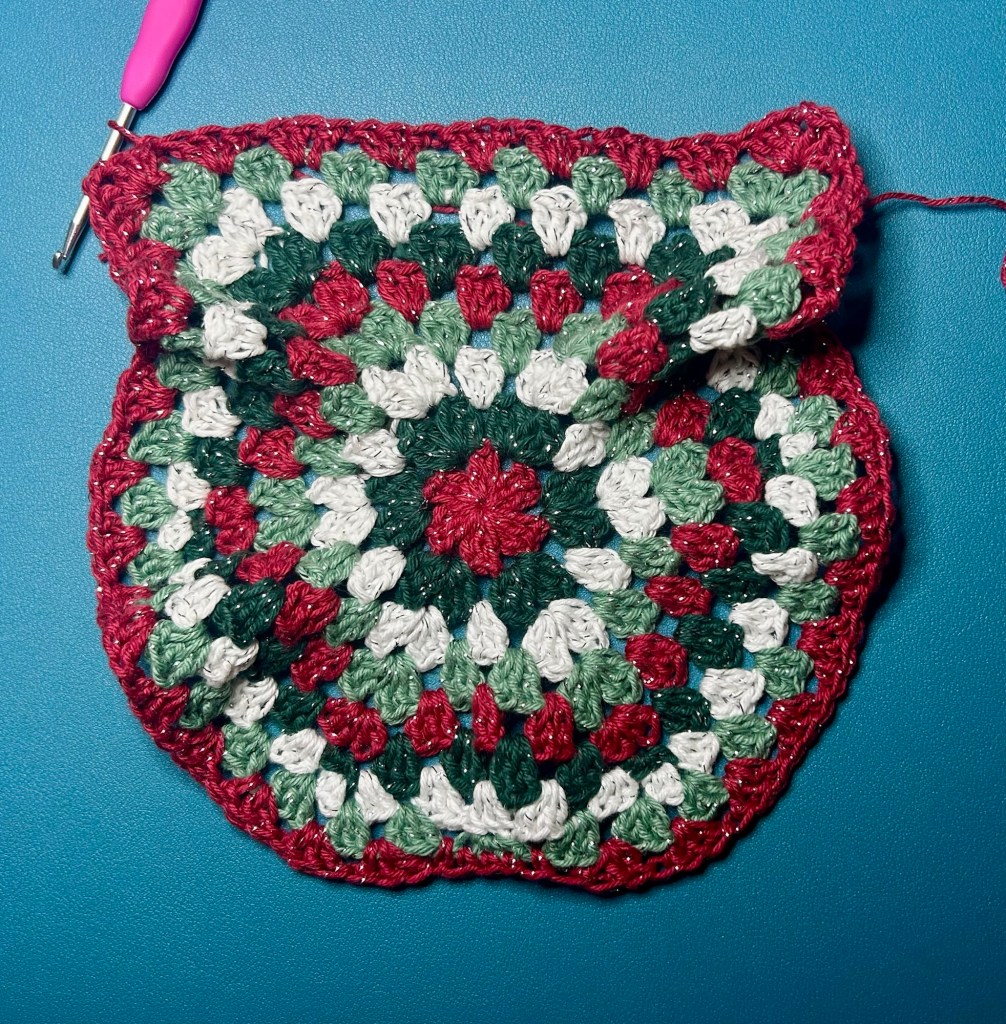
I didn’t invent turning a hexi into a stocking — anyone who has made a hexi cardigan has had a moment when you realize that little L could serve more purposes. But there is a problem: if you go with a simple folded hexi, your stocking will have 90 degree corners at the toes and heel and, even turning them inside out, they come blocky and angular.
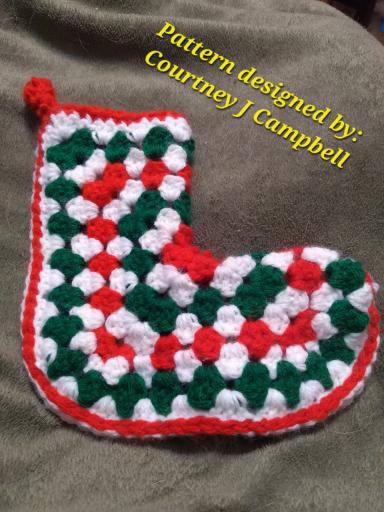
So, I developed a pattern that remains very simple, but that rounds out those sharp corners, creating a softer stocking. I designed this pattern in such a way that each size builds upon the one below, so that, should you decide you want to go one size larger, you don’t need to unravel your project — just go to the pattern a size up and carry on with the next numbered round. To make things even easier, this is a no-sew pattern — in the final round, you slip stitch the sides of the stocking together. Upon doing so, you have the option of either leaving it as is (I like the look of the sl sts down the side) or flipping it inside out for an even more rounded look.

The benefit to using a traditional granny cluster for these is that the stitch offers familiarity and ease of repetition, making this work up very quickly. I made mine with Hobbii Rainbow 8/4 Glitter, making them a bit dainty, but you can use any yarn at all to make these, bearing in mind that you should use the hook size appropriate for your yarn of choice and that using thicker or finer yarn will change the size of the project.
You can use any color and change as many or as few times as you wish. Optionally, if you are a more advanced crocheter, you could add a furry or chenille yarn for a few rows across the top to create a more traditional stocking look. I do suggest weaving in your ends, so if this bothers you, beware the color changes. Then again, if you are making one of the small ones and it is just a gift holder … will anyone notice if you just stuff them to the wrong side?
I hope you enjoy making this project! If you have any questions or feedback, please feel free to leave them in the comments. I’d love to see a photo of your finished work, so consider adding that below or to a project on Ravelry as well!
To complete this project, you will need to know how to:
- Start a project in the round
- Work a granny cluster
- Do a single crochet
- Do a half double crochet
- Do a double crochet
- Join
- Chain
- Slip stitch
- Finish off
- Weave in ends
Difficulty level: Beginner – pattern uses chain (ch), single crochet (sc), half double crochet (hdc), double crochet (dc), slip stitch (sl st), and working in the round (rnd). Stitch count is included at the end of the line for each round.
Finished size:
The sizes below are for superfine/fingering/4-ply cotton. They will vary according to the thickness of the yarn you choose.
Small: about 12.5 cm / 5 in long at longest point; 9.5 cm / 3.75 in from heel to toe.
Medium: about 15 cm / 6 in long at longest point; 11 cm / 4.25 in from heel to toe.
Large: about 20.5 cm / 8 in long at longest point; 15 cm / 6 in from heel to toe.
Materials:
- Yarn of your choice. I used Hobbii Rainbow 8/4 Glitter, which is a fingering weight. If you use the same weight of yarn you will need:
- Small: 10 g/.35 oz, roughly 32 m/ 35 yds
- Medium: 13 g/.46 oz, roughly 42 m/ 45 yds
- Large: 25 g/.90 oz, roughly 80 m/ 87 yds
- Crochet hook appropriate in size for the yarn you choose. In my case, I used a 3.5mm hook.
- Yarn needle for sewing in ends
Gauge: Gauge is only important if you aim for the exact measurements that I include above. If so, gauge is: 10 x 10 cm (4in x 4in) = 27 sts x 38 rows
Abbreviations
- round (rnd)
- magic ring (mr)
- granny cluster (gc)
- single crochet (sc)
- half double crochet (hdc)
- double crochet (dc)
- slip stitch (sl st)
- stitch (st)
- chain (ch)
Stitch notes:
A gc is worked by placing three dc in the same sp. In this pattern, the only time chs are added between gc is to make corners.
In a starting gc, starting ch 3 counts as first dc in gc. A starting gc, then, is worked by placing a starting ch 3 and 2 dc in the same sp.
At the beginning of each rnd, you will need to sl st through the sts made by the starting gc of the previous round to reach the corner. This doesn’t need to be exact — just place them evenly.
NOTES:
Pattern follows US terms.
Bold numbers at the end of each round are total st count.
Repeat stitches between parentheses/brackets.
If changing colors, do so in the ch-2 sp that forms the first corner.
“Clusters” refers to gc, as well as groups of sc and hdc.
All rights reserved by Courtney J Campbell
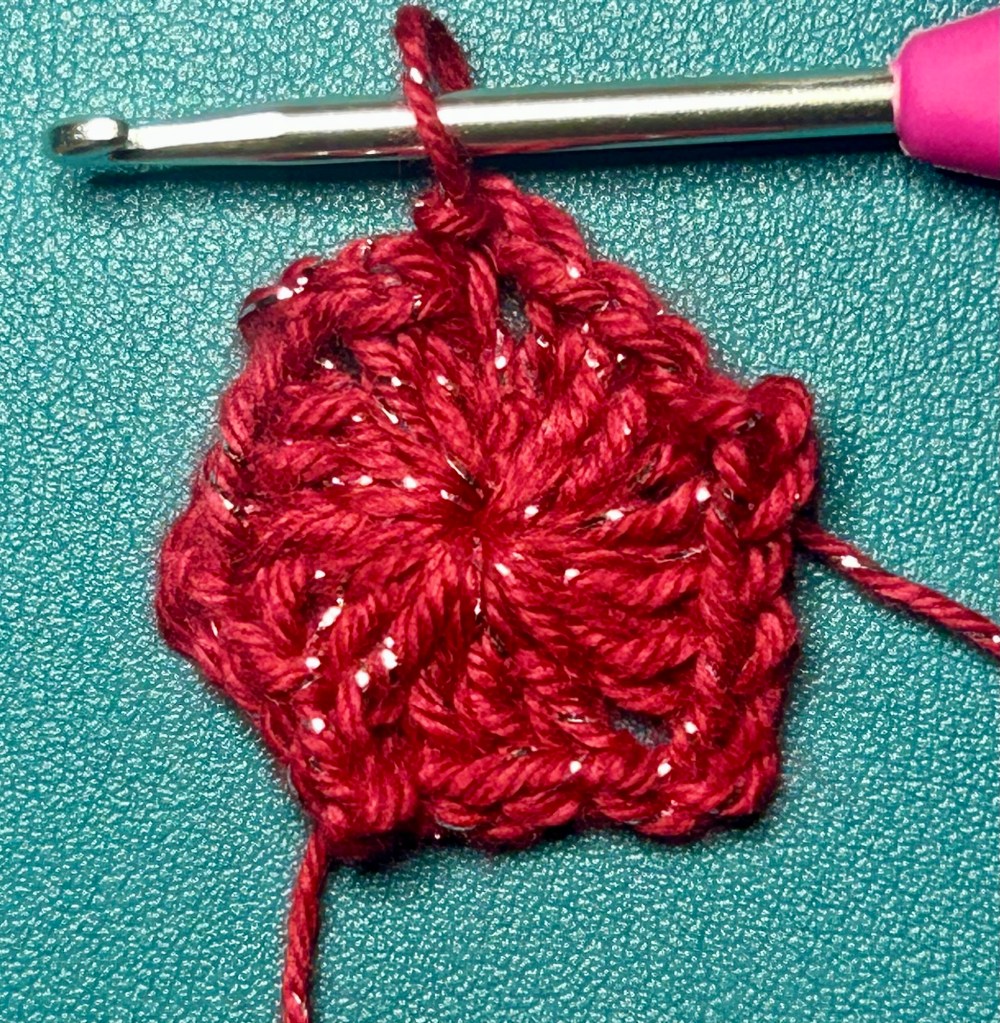
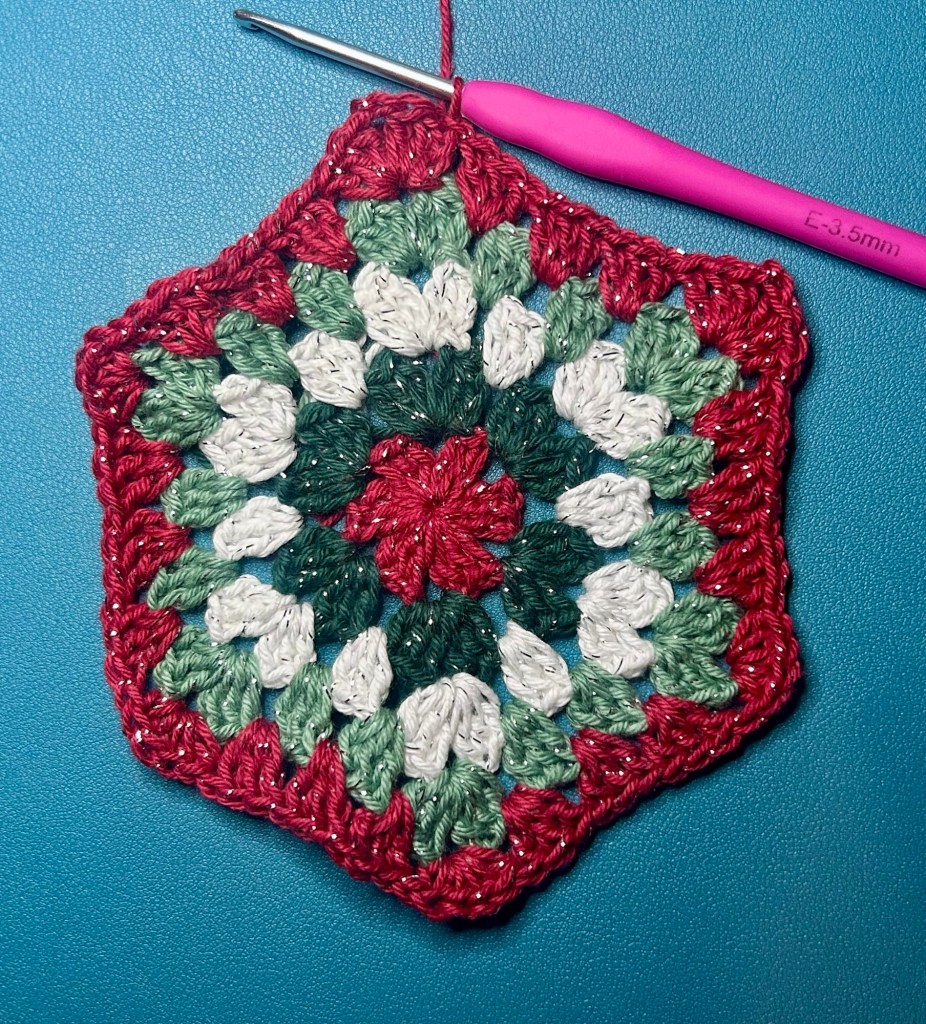
Rnd 1: In mr, [ch3 (counts as first dc), 2dc] (counts as starting granny cluster here and throughout), (ch2, gc) five times, ch2. Close mr and join with sl st to top of starting ch. 6 gc, 12 ch, total.
All rights reserved by Courtney J Campbell
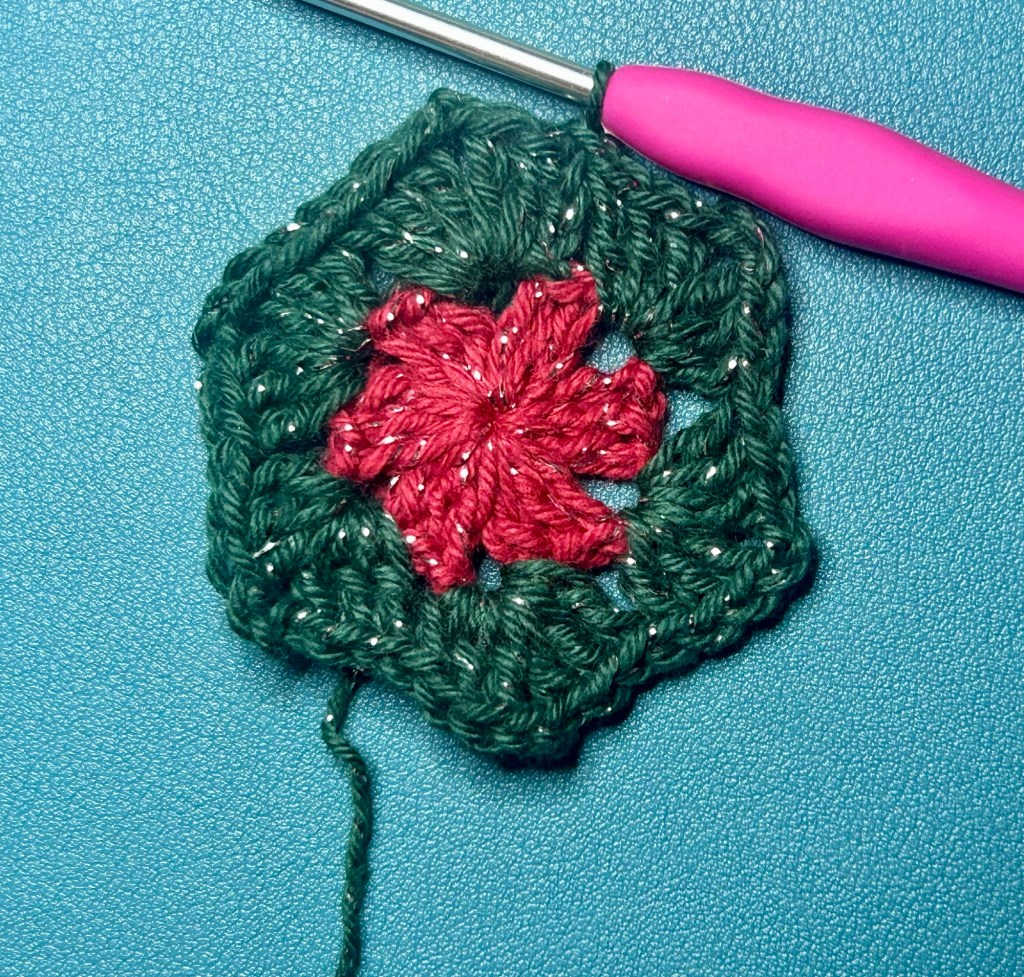
Rnd 2: sl st to first ch-2 sp, (starting gc, ch 2, gc) in ch-2 sp, *sk to next ch-2 sp (gc, ch 2, gc) in next gc **, repeat from * to ** five times. Join with sl st to top of starting ch. 12 gc, 12 ch.
All rights reserved by Courtney J Campbell
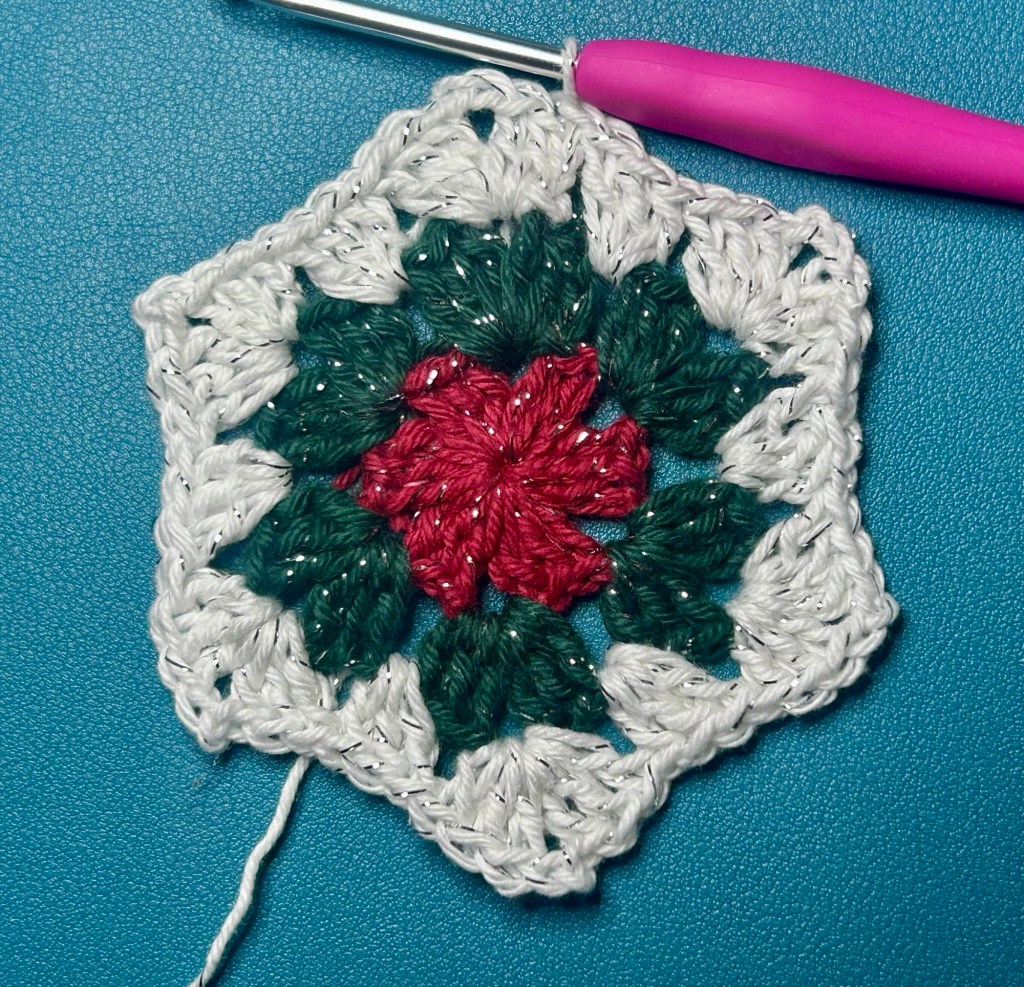
Rnd 3: sl st to first ch-2 sp, (starting gc, ch 2, gc) in ch-2 sp, *gc in space between 2 gcs made in previous row, sk to next ch-2 sp, (gc, ch 2, gc) in ch-2 sp**, repeat from * to ** five times, gc in sp between next 2 gc made in previous row. Join with sl st to top of starting ch. 18 gc, 12 ch.
All rights reserved by Courtney J Campbell
Rnd 4: sl st to first ch-2 sp, (starting gc, ch 2, gc) in ch-2 sp, *(gc in sp between next two gc made in previous row) twice. Sk to next ch-2 sp, (gc, ch 2, gc) in ch-2 sp**, repeat from * to ** five times, (gc in sp between next two gc made in previous row) twice. Join with sl st to top of starting ch. 24 gc, 12 ch.
All rights reserved by Courtney J Campbell
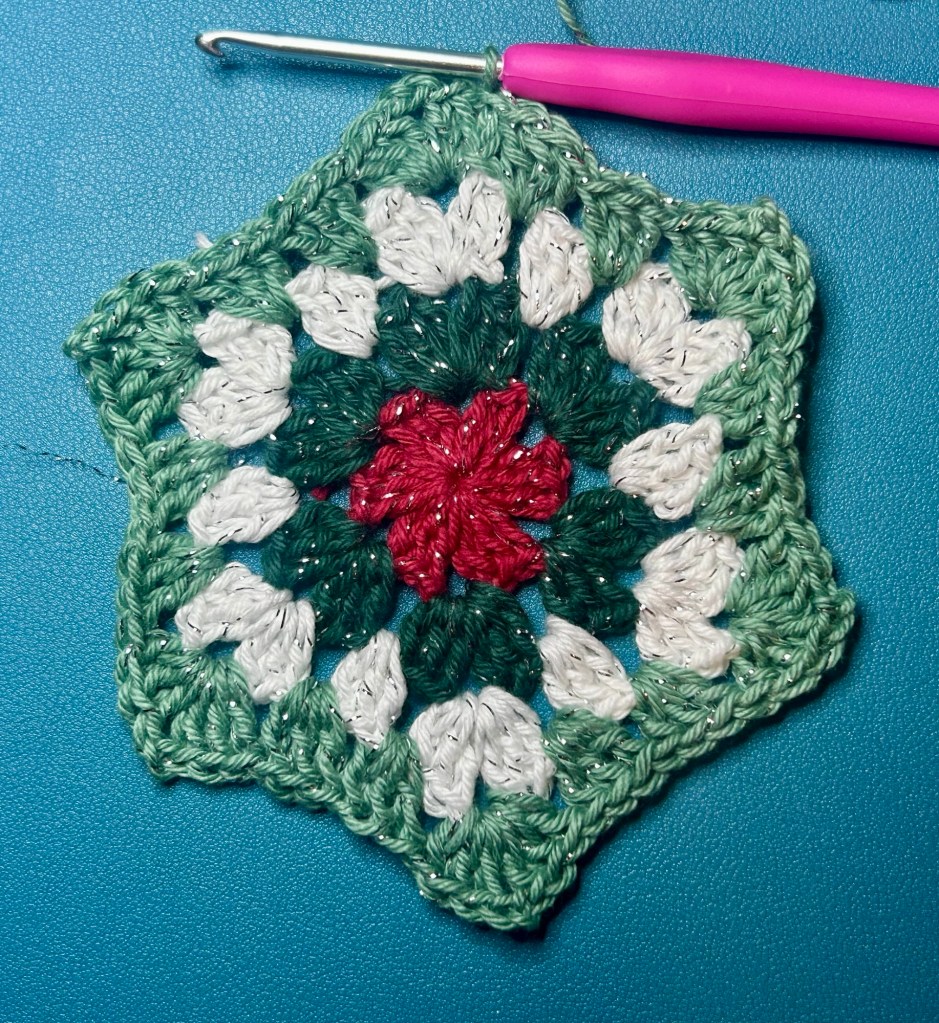
Note that, starting here, some of your clusters will be hdc or sc!
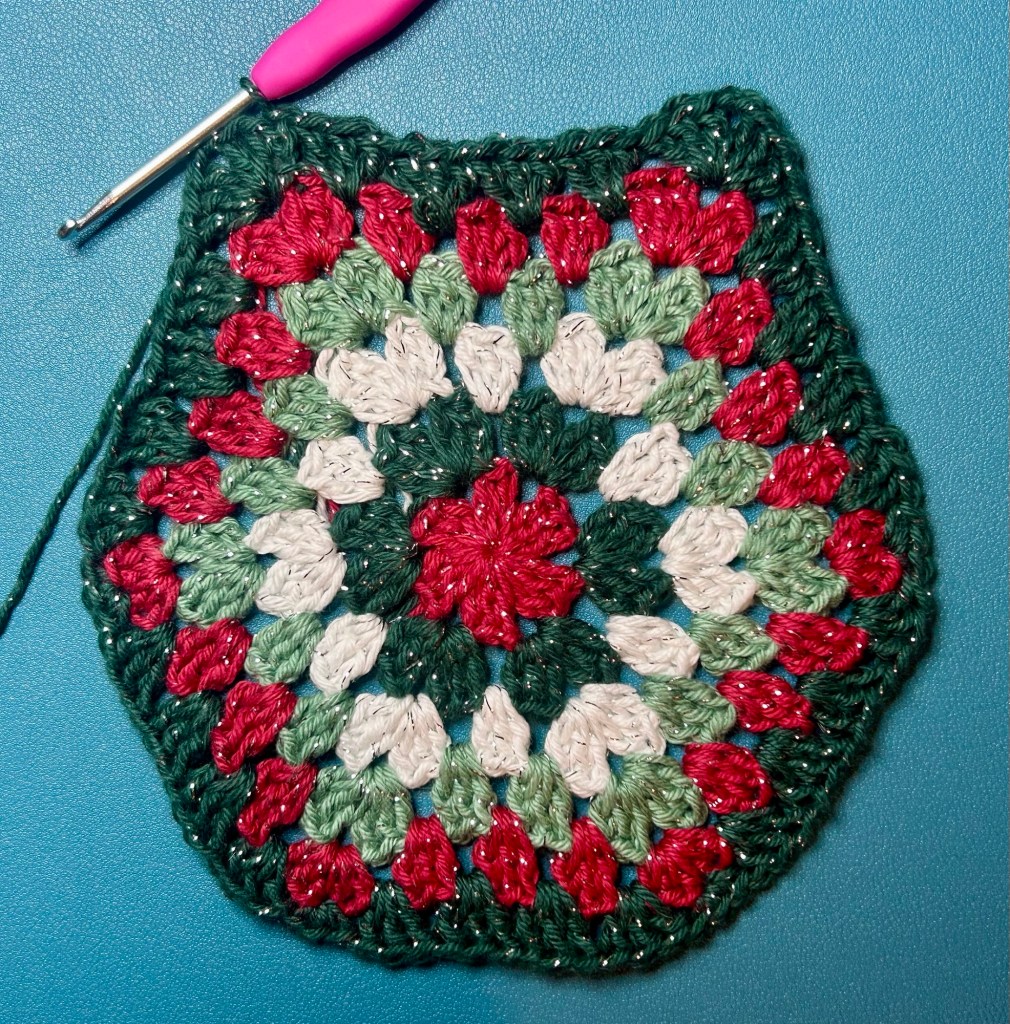
Rnd 5: sl st to first ch-2 sp, (starting gc, ch 2, gc) in ch-2 sp, *(gc in sp between next two gc in previous row) three times. Sk to next ch-2 sp, 5 hdc in ch-2 sp**, repeat from * to ** four times. (Gc in sp between next two gc in previous row) three times. Sk to next ch-2 sp, (gc, ch 2, gc) in ch-2 sp, (gc in sp between next two gc clusters in previous row) three times. Join with sl st to top of starting ch. 22 gc, 20hdc, 4 ch.
If you are making a small stocking, skip to “Finishing rnd” below.
All rights reserved by Courtney J Campbell
** From here on, remember that “clusters” refers to gc, as well as groups of hdc and sc. **
Rnd 6: sl st to first ch-2 sp, (starting gc, ch 2, gc) in ch-2 sp, (gc in sp between next two clusters) four times, * 3 sc in st made from 3rd hdc of previous row, (gc in sp between next two clusters in previous row) four times **, repeat from * to ** four times. Sk to next ch-2 sp, (gc, ch 2, gc) in ch-2 sp, gc in sp between next two gc in previous row) four times. Join with sl st to top of starting ch. 28 gc clusters, 12 sc, 4 ch.
If you are making a medium stocking, skip to “Finishing rnd” below.
All rights reserved by Courtney J Campbell
Rnd 7: sl st to first ch-2 sp, (starting gc, ch 2, gc) in ch-2 sp, (gc in sp between next two gc in previous row) four times, * 3hdc in sp between gc and sc cluster in previous row, 3 sc in st made from 2nd sc of previous row, 3hdc in sp between sc and gc cluster in previous row, (gc in sp between next two gc in previous row) three times **, repeat from * to ** four times, gc in sp between next two gc in previous row, sk to next ch-2 sp, (gc, ch 2, gc) in ch-2 sp, (gc in sp between next two gc in previous row) five times. Join with sl st to top of starting ch. 26 gc clusters, 24 hdc, 12 sc, 4 ch.
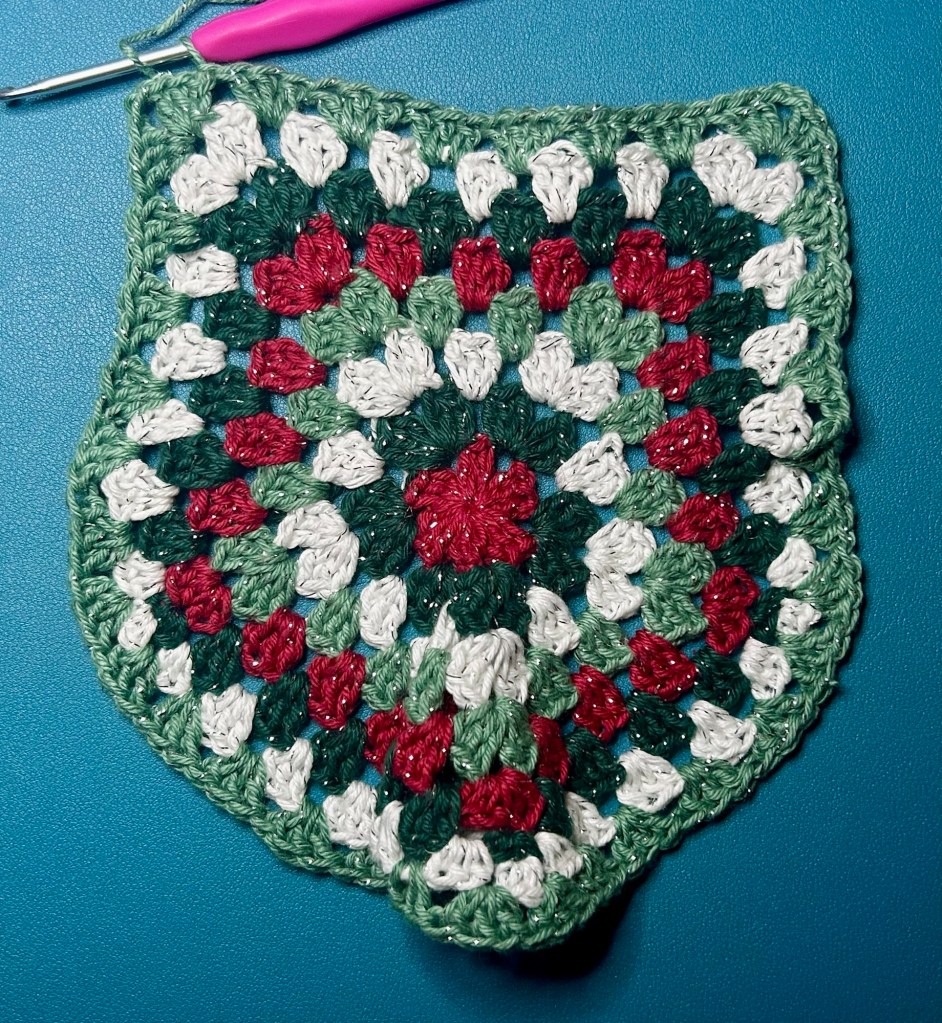
It is normal for the panel to stop lying flat at this point.
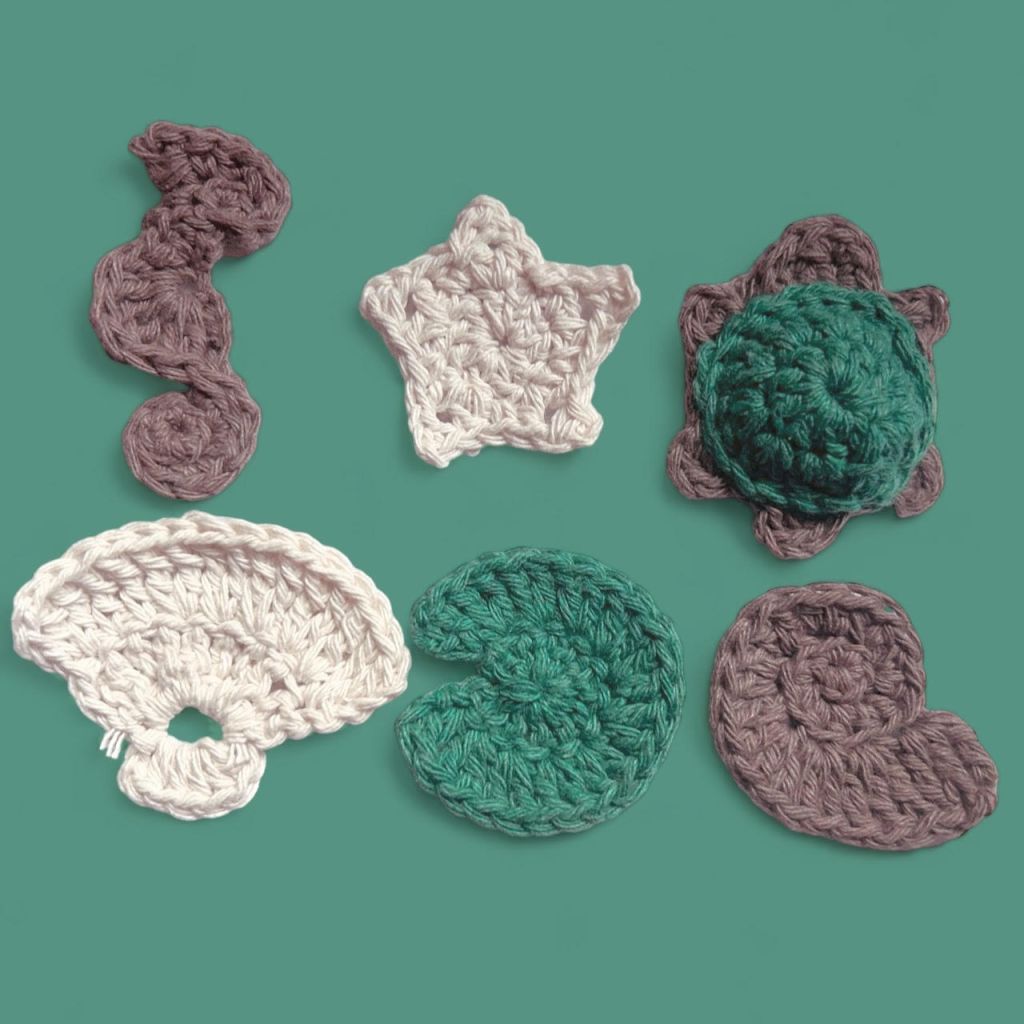
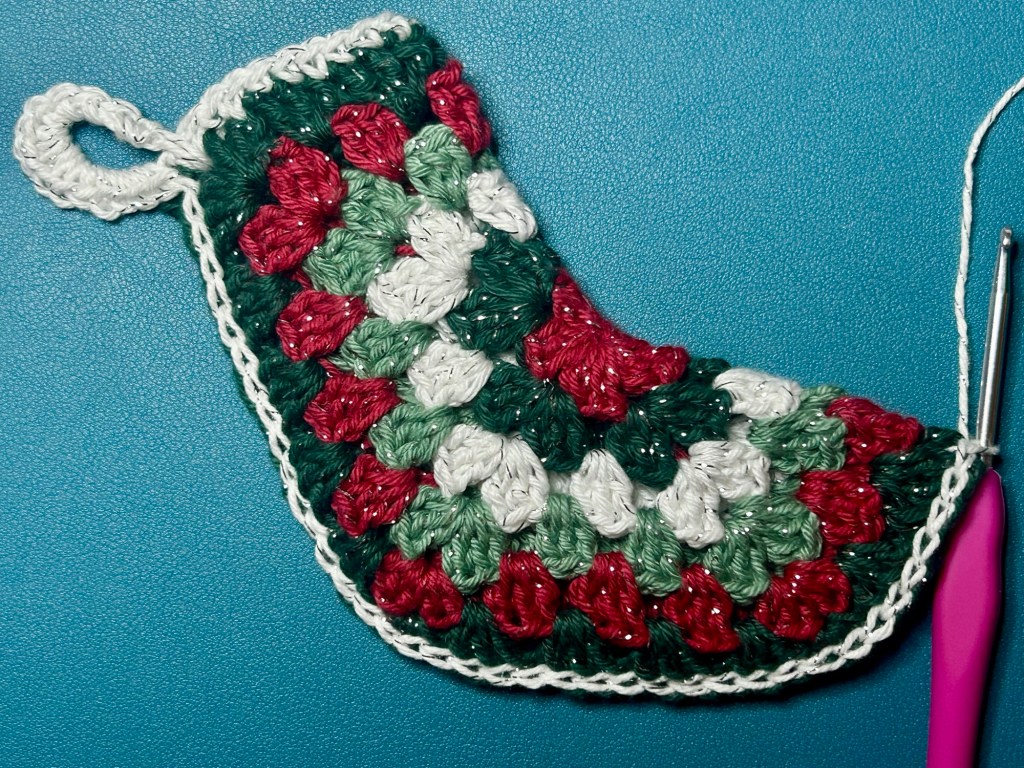
IMPORTANT NOTE: In rounds 8 and 9, you will start to create a dip, mid-side, to help round the toe once it’s folded. You can see best what I’m referring to in the photo for Round 9. Trust the process! You can avoid doing this, continuing with the pattern at a larger scale as set out above, but your toe will then have one rounded corner and one that is at a 90 degree angle. The dip in created by the sc mid-side rounds the corner.
All rights reserved by Courtney J Campbell
Rnd 8: sl st to first ch-2 sp, (starting gc, ch 2, gc) in ch-2 sp, (gc in sp between next two clusters — including between sc and hdc clusters — of previous row) 14 times, sk next cluster, 3 sc in second st of the following gc, sk next cluster, (gc in sp between next two clusters of previous row) 14 times, sk to next ch-2 sp, (gc, ch 2, gc) in ch-2 sp, (gc in sp between next two gc in previous row) six times. Join with sl st to top of starting ch. 38 gc clusters, 3 sc, 4 ch.
All rights reserved by Courtney J Campbell
Rnd 9: sl st to first ch-2 sp, (starting gc, ch 2, gc) in ch-2 sp, (gc in sp between next two in previous row) 14 times, sc in next sp between clusters, sc in next 3 sts, sc in next sp between clusters, (gc in sp between next two go in previous row) 14 times, sk to next ch-2 sp, (gc, ch 2, gc) in ch-2 sp, (gc in sp between next two gc clusters in previous row) seven times. Join with sl st to top of starting ch. 39 gc, 5 sc, 4 ch.
Continue to “Finishing rnd” below.
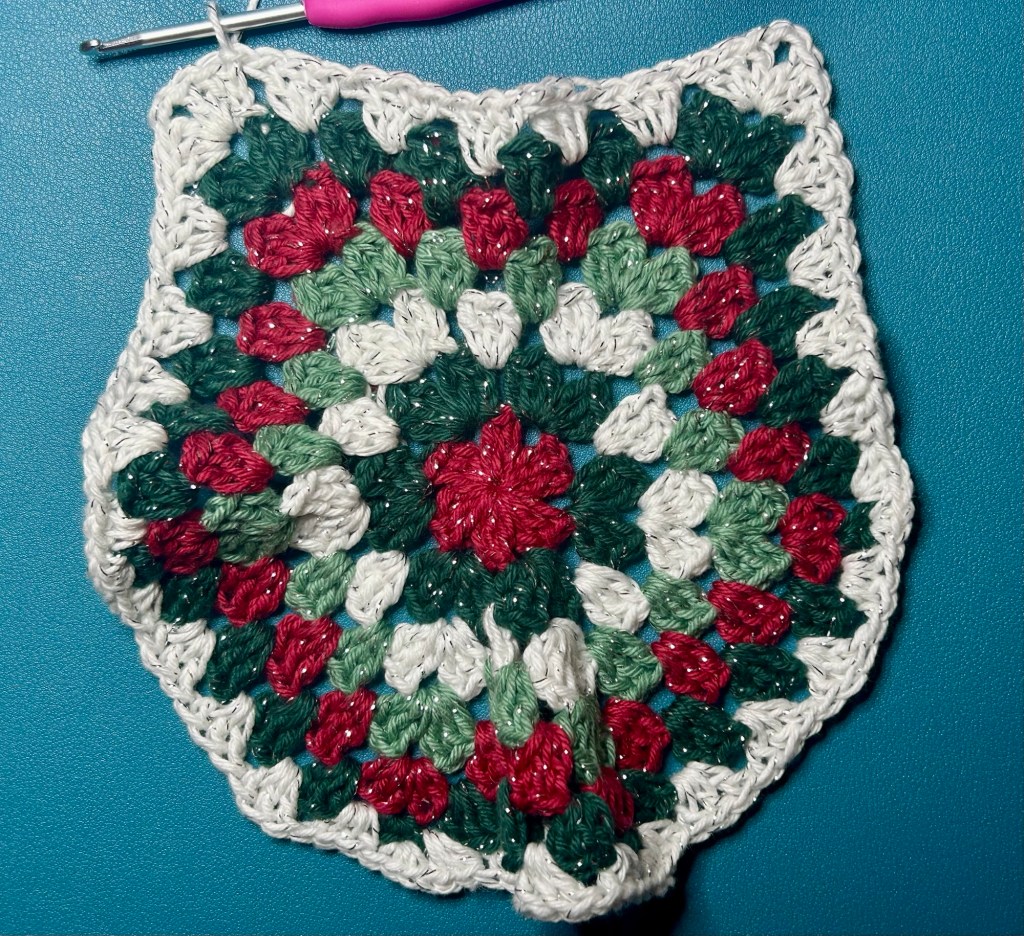
Finishing Rounds
The stocking looks best if you do the finishing round in the same color as the previous round. I use a contrasting color in the photos to make it easier for you to see the finishing round.
All rights reserved by Courtney J Campbell
All rights reserved by Courtney J Campbell
All rights reserved by Courtney J Campbell
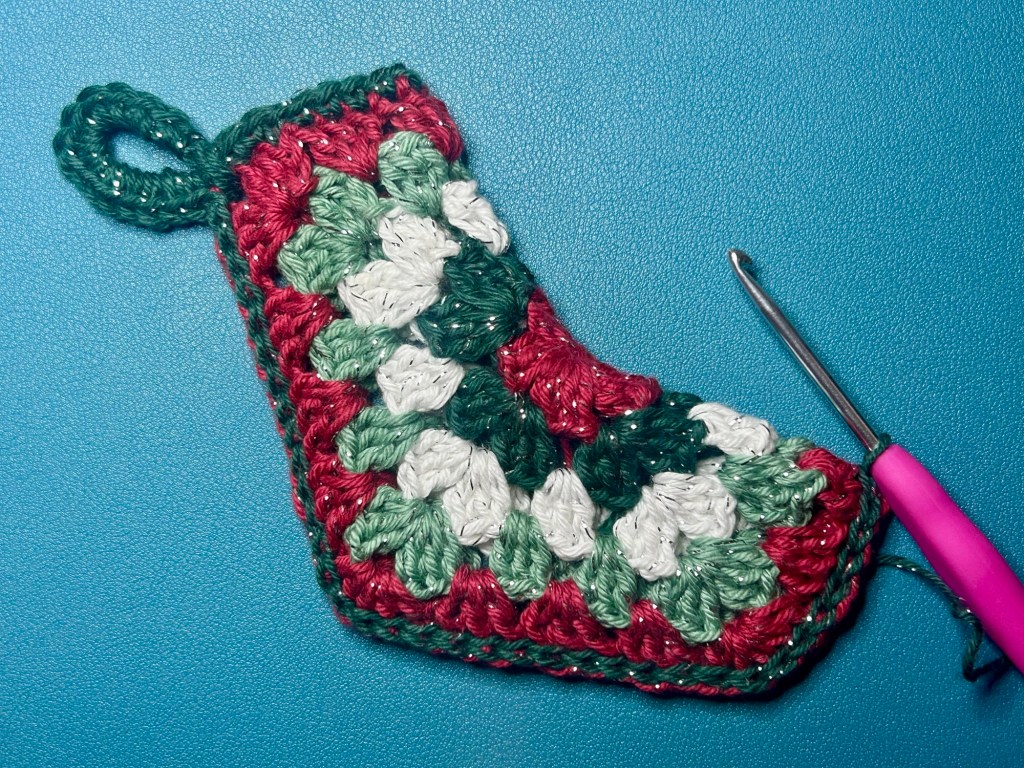
Finishing rnd: sl st in next st, fold in half to create an L shape, with the two 90 degree corners (the ones with ch-2 sp) aligned, wrong side together, right side facing out (unless you intend to turn this inside out, in which case, wrong side out), sl st through both ch-2 sp to join sides. This is the front of the stocking. Ch 1, flip stocking along vertical axis so that you are now working along the top sts of the back of the stocking, sc in each of the 15 (for small), 18 (for medium) or 27 (for large) sts around the top (front and back) without joining panels (this is the stocking opening at the top), when back at joined ch-2 sps, sl st again through joined ch-2 sp, ch 10, flip to the back again and join ch back to stocking with sl st through ch-2 sps, ch-1, 15 sc around ch, moving back toward start. With front side facing, sl st through ch-2 sps again. Working down the side, hold sides of stocking together and sl st in each st down the side and bottom to join sides. 15/18/27 sc, sl sts to join as needed.
Finish off, weave in ends. When weaving in end at tip of heel, you can round the corner off a bit by sewing the end up the back of the stocking and pulling it a bit, before weaving it back down again. From here you can leave the stocking as is or turn inside out.
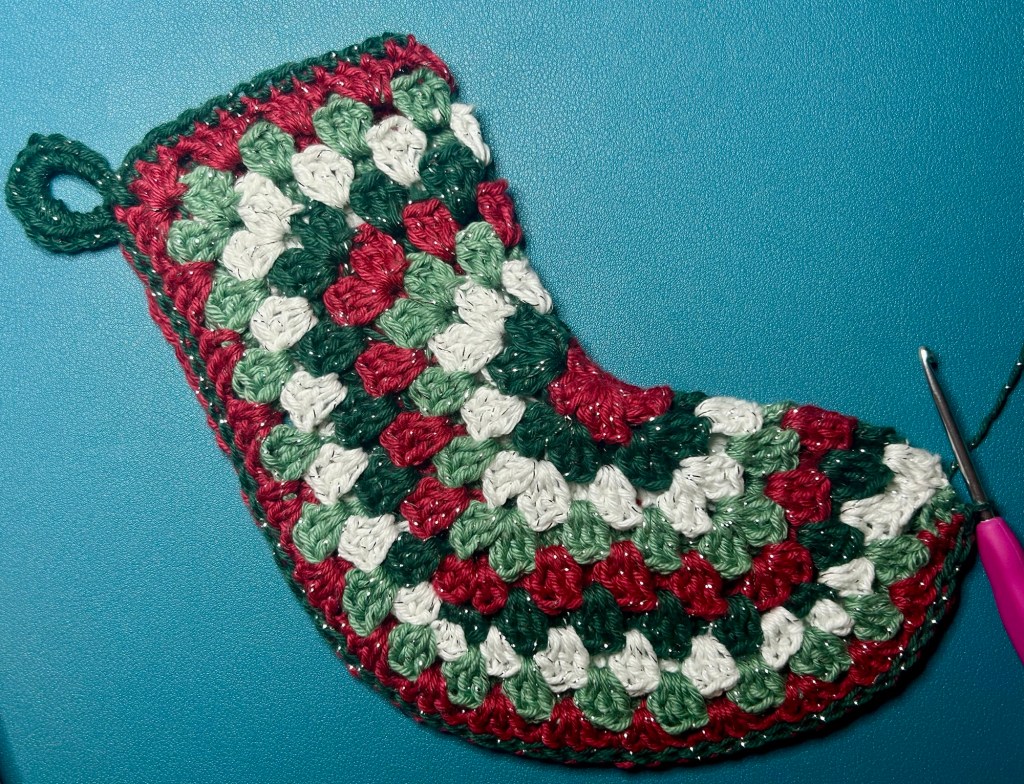
Now stuff them full of treats and gifts!
Thank you to the amazing crocheters who tested this pattern for me and provided valuable feedback and images. See how lovely their projects turned out:
Vipa Bernhardt:
Deb Martin:
And thank *you* for visiting my site! Please consider creating a project on Ravelry for your stockings and like, subscribe, and share an image of your project here in the comments!

Leave a comment