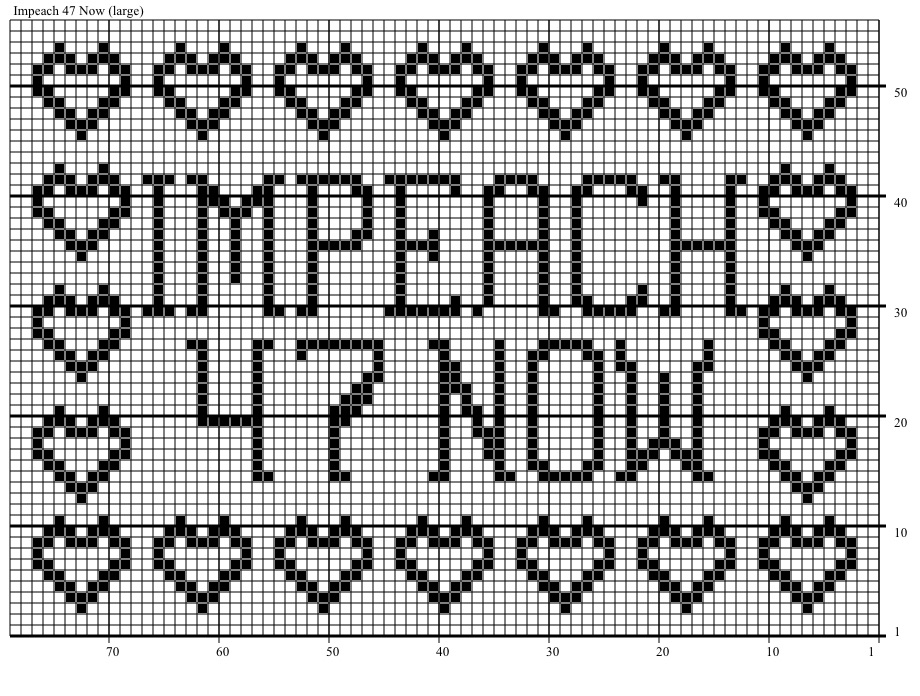
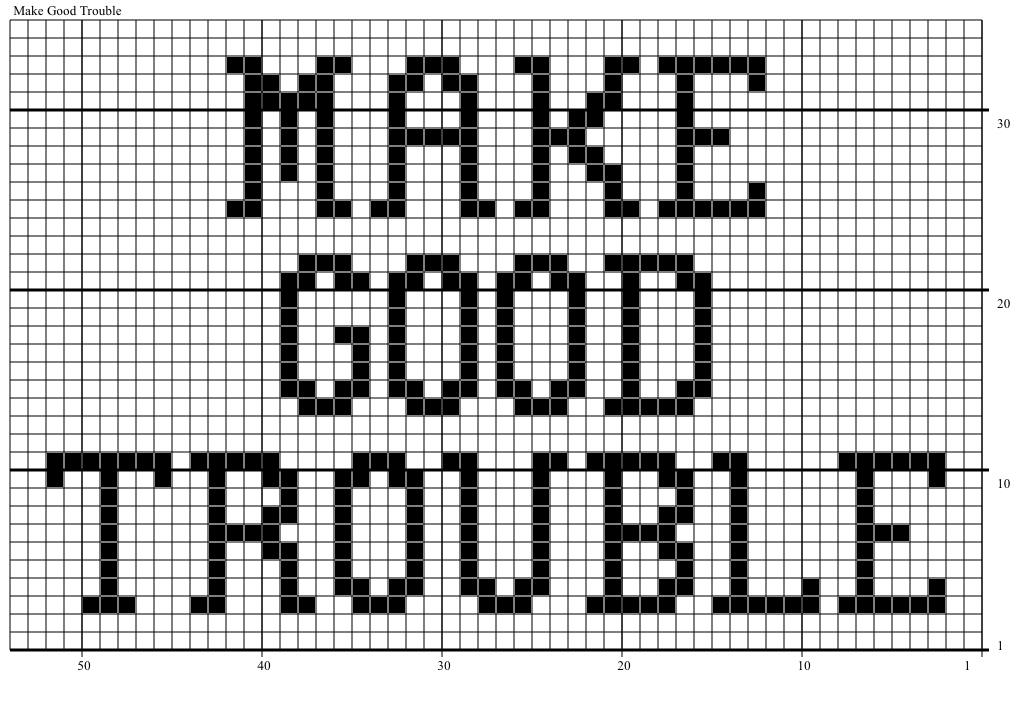
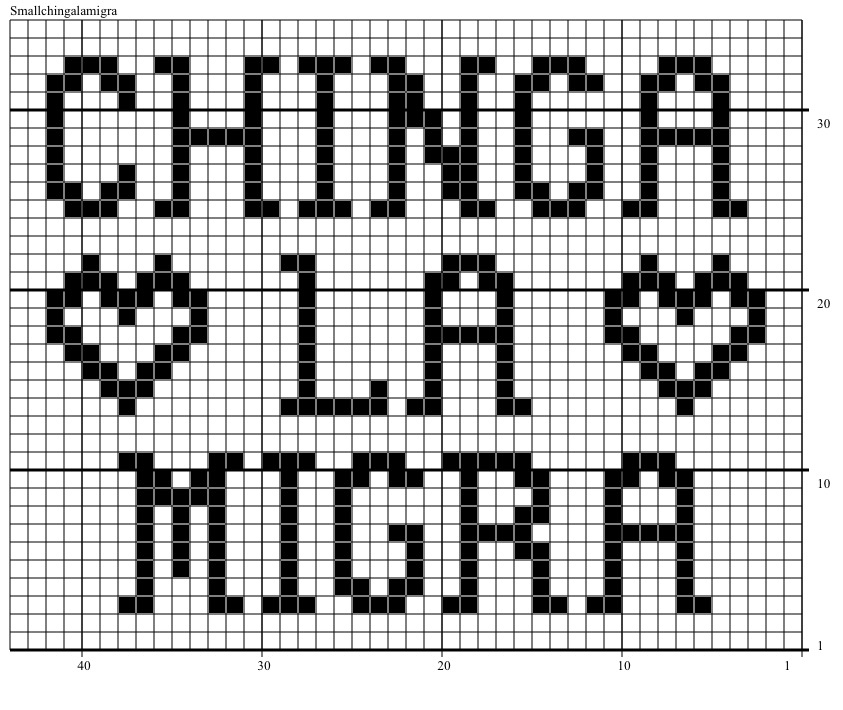
Filet crochet graph and pattern
This pattern has not been tested. If you make one, please let me know if you notice any mistakes and please share a photo that I can add for people to see how it comes out. I’m not sure if the top of the wine glass will be
Materials:
Crochet cotton. I prefer size 10, but you can use size 20 or 30 if you wish to make this smaller or a thicker sport, dk, or even worsted weight, if you’d like to make this quite large. If you are using size 20, you will need about 212 yards.
Metal crochet hook:
- if using size 10 cotton, use a 1.25 to 1.75 mm hook (or size needed for gauge
- if using size 20 cotton, use a .9 to 1.25 mm hook (or size needed for gauge)
Gauge:
- if using size 10 cotton: 4 ch-2 sp = 1 inch; 4 rows = 1 inch
- if using size 20 cotton: 10 ch-2 sp = 2.2 inches; 10 rows = 2.4 inches
Approximate finished sizes:
- if using size 10 cotton: 11 inches wide, 8.75 inches high
- if using size 20 cotton: 13.2 inches wide, 7.92 inches high
Some general filet crochet instructions: Filet crochet usually relies on a design plotted over a graph, worked in rows (but there is filet worked in the round as well), beginning from the bottom and working your way up. You follow the graph by zig zagging across; so, the first row, you read left to right, but the next, you read right to left, continuing to alternate your way up from the bottom.
You begin with a starting ch (at the bottom). Calculate the number of ch you need for your starting ch by multiplying the number of boxes across you need by three and adding one. At the end of your starting ch, you need to add 3 ch for the side of the first box and 2 ch for the top (so add 5 more ch total), then work your first dc in the ninth ch from your hook. Then, every blank square is worked as (ch 2, sk 2 ch, dc in next) across the starting ch. On subsequent rows, you ch 5 at the start (again, this is the side and top of the first box), then every blank square is worked either as (ch 2, sk 2 st, dc in next) or as (ch 2, sk ch-2 sp, dc in next st), depending on whether the square bellow was filled or empty. Each filled square is worked as (dc in next 3 st). In this way, the blank squares form a mesh and the filled in squares become the solid parts of the design. No matter what, whether a filled or blank square, each square takes up 3 spaces. Once you have completed the pattern, row by row, from the bottom up, you can add some pretty edging. Simple! The only really hard bit is not losing count as you go along and getting the tension right on that starting ch.
INSTRUCTIONS: Starting at the bottom of the pattern, ch 181. Ch 3 more to count as first dc of first row. Ch 2 more and dc in 9th ch from hook to complete bottom right open square of row 1. Continue following graph for first row reading pattern from right to left, with every blank square worked as (ch 2, sk 2 ch, dc in next) across the starting ch. After completing the first row, ch 5 to turn to start the next row and dc in first st. Continue following graph with every blank square worked either as (ch 2, sk 2 st, dc in next) or as (ch 2, sk ch-2 sp, dc in next st), depending on whether the square bellow was filled or empty. Each filled square is worked as (dc in next 3 st). At end of row 33, either fasten off, or work filet edging of choice.

Leave a comment